Kodeclik Blog
Clicker games are a popular video game genre. You’ve probably heard of Cookie Clicker, one of the most popular clicker games out there. This blog post will show you how to create your own clicker game… in Scratch!
Scratch is a visual programming language developed by the MIT Media Lab that enables users to create their own interactive stories, animations, games, music, and art. It was designed to introduce children as young as 8 years old to coding concepts and have fun while doing it. With Scratch’s easy-to-use interface and drag-and-drop programming blocks, anyone can create their own interactive projects without any prior coding experience.
The first thing you'll need to do is open up a new project in the Scratch editor. After you open up the project, we will add a few sprites – these will be the characters in your game – and give each one logic commands reflecting the rules of the game. You'll also want to create some user interface elements such as a score counter, events that allow players to trigger certain actions, and other interactive elements like sound effects or images.
In more detail, to make your clicker game, you need to choose two sprites, one to represent your mouse/cursor as it moves and one for the object that you are trying to click (e.g., a cake or a ball). Then we will write code for each object so that you receive points when the cursor correctly clicks on the object.
We will use a cursor sprite and a cake sprite in our clicker game.
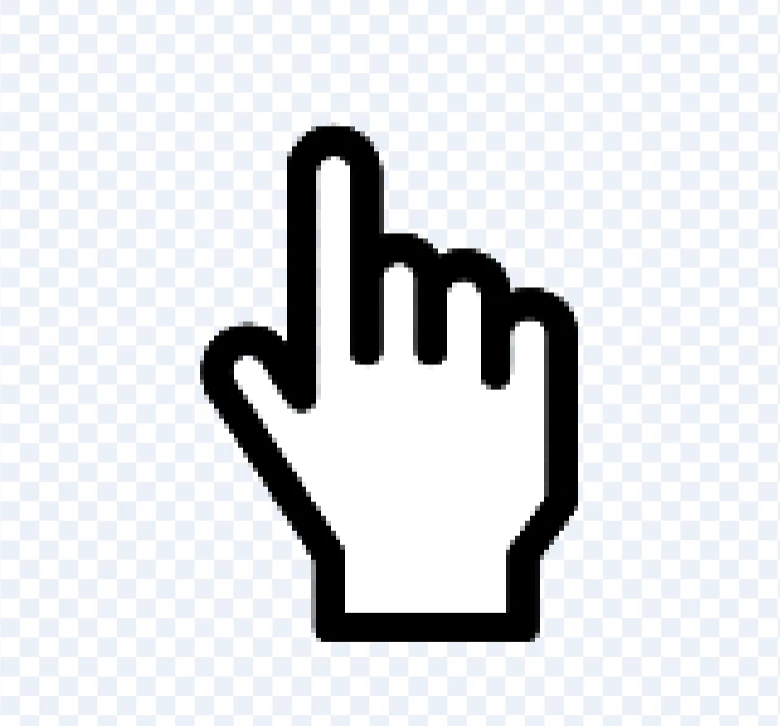
Let's make a cursor that follows our mouse in the game. We will choose the following cursor sprite for our game:
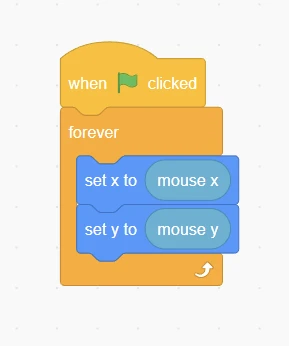
The code can be seen in the below image. This program is simply a forever (infinite) loop that moves the sprite (x and y coordinates) to wherever the mouse goes (i.e., the mouse’s x and y coordinates).
Essentially, the above code sets the cursor position to always be at our mouse, achieving our goal!
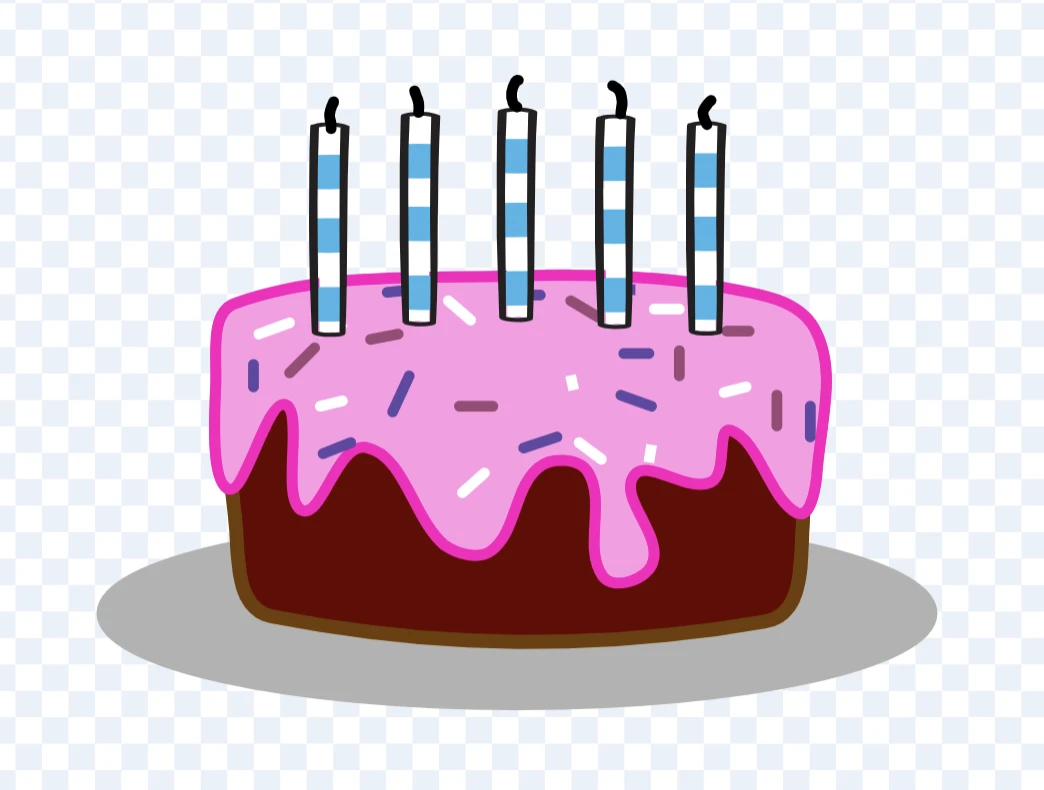
We will choose a cake sprite as shown below but you can choose any sprite you like! Choose a sprite that has two costumes that you can change between when the sprite is clicked. In Scratch, costumes are basically different versions of the sprite, and each costume has something different about the looks of the sprite.
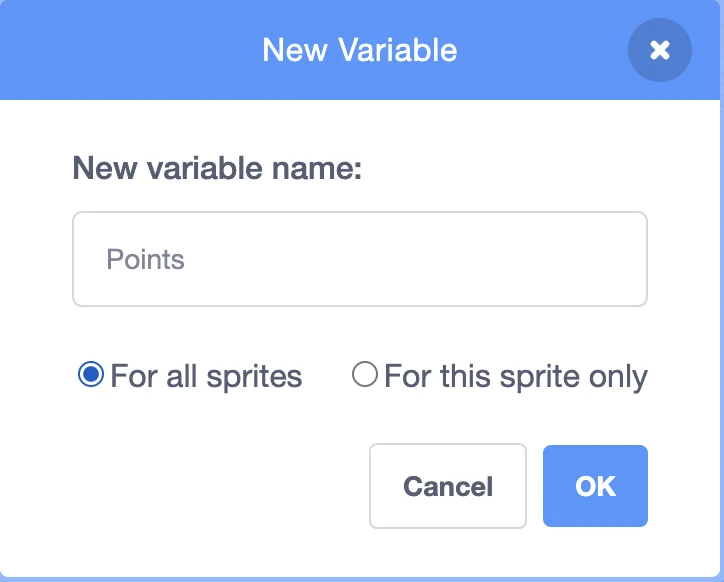
Go to the variables tab and create a new variable for all sprites named “Points”. This variable will hold the score as points are awarded for successful clicking.
Now let's make an event that triggers when the cake is clicked by our cursor sprite. The code is as shown below. Whenever the cursor sprite is touching the cake we increase our Points variable by 1 and broadcast a message called “CLICKED!”
Basically if we click our mouse on the cursor (because our mouse is always on top of the cursor) and our cursor is touching our cake, then our Points (which is a variable) goes up by one and we broadcast the message “CLICKED!” which we will come back to later.
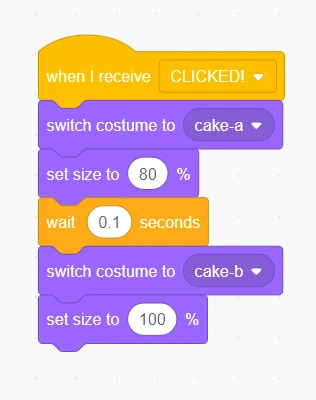
Now let’s look at the cake’s code. When the cake receives the message broadcast earlier, its costume switches so it goes from a candle not lit state, to a candlelit state, and it decreases in size, to add a click effect. After a fraction of a second, the cake settings go back to normal. This gives feedback to the user that the cake has been successfully clicked.
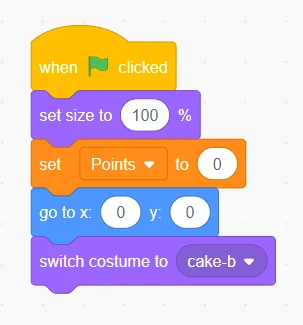
Finally lets make code for the start of the game in the cake sprite. Essentially here we are restarting everything. The cake’s position, size, and costume are reverted to what we want it to be, and we set the Points to zero to restart the game. Note that we start with the cake-b costume.
Finally, once you've coded all the necessary logic for your game, it's time to test it out! Make sure everything works as expected—if not, debug any errors until they're resolved. Once that's done, you're ready to share your clicker game with friends and family!
Now you have learnt how to write your own clicker game! Making a clicker game may seem intimidating at first but once broken down into its various components it becomes quite manageable! With Scratch's intuitive interface and easy-to-understand code blocks anyone can make their own clicker game without prior coding experience. So what are you waiting for? Get started on your clicker adventure today!
Congratulations on learning to build the Clicker game in Scratch!
Next Step: Learn more about variables in Scratch.
Once you master variables, you will be ready to learn how to make a platformer game in Scratch!
Check out some fun Scratch Resources.
Take Your Scratch skills to the next level
Ready to create amazing games, animations, and stories? Kodeclik’s Scratch courses teach you how to code while bringing your ideas to life. Whether you're just starting out or looking to master advanced projects, there's something exciting waiting for you.
Want to learn Scratch with us? Sign up for our Scratch Programming online class.