Kodeclik Blog
Kaleidoscope animation in Scratch: A step by step guide
In this animation project, we will show you how to create a fascinating Scratch animation using the Scratch programming blocks. We will make this animation using a single sprite and multiple clones of the sprite. We will use the movement and color effect blocks to create our animation.
What is Scratch Animation?
Scratch is a great tool to create fun animations. It allows users to develop interactive stories, games, and animations by assembling code blocks, making the process both intuitive and educational. Utilizing a visual interface, Scratch enables aspiring animators to bring characters and scenes to life through simple drag-and-drop commands, fostering creativity and programming skills in a user-friendly environment. With its emphasis on accessibility and creativity, Scratch animation empowers users to explore their imagination while learning fundamental programming concepts.
Step 1: Setup - Log in to Scratch and create a new project
The first thing you'll need to do is open up a new project in the Scratch editor.
Step 2: Draw your own triangle sprite
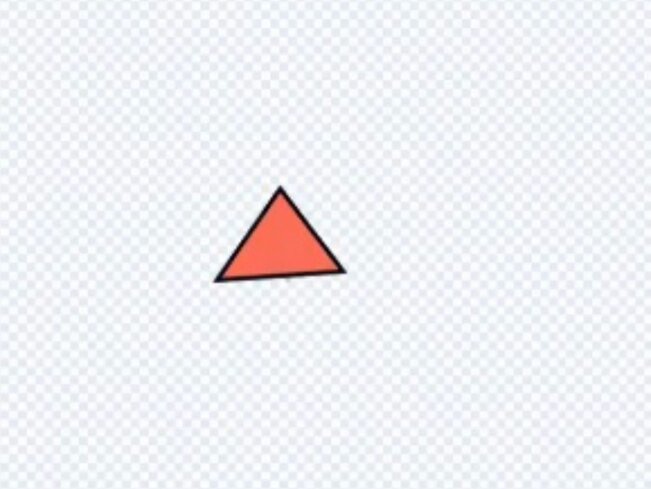
Delete the scratch cat sprite and create your own triangle sprite. Use the line tool to create a simple triangle and fill it with your favorite color.
Step 3: Create 12 clones of the triangle sprite
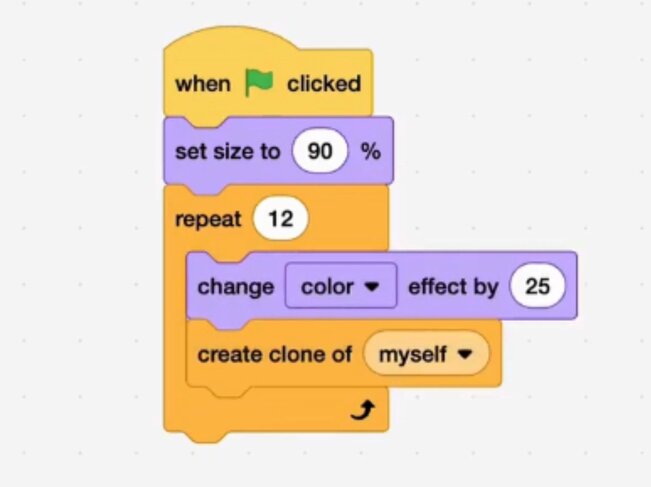
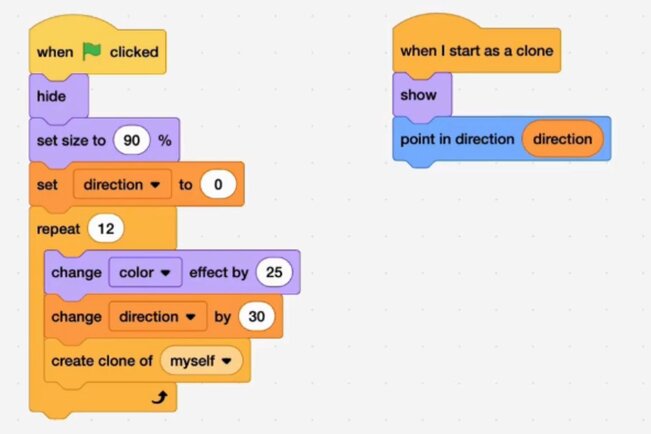
Since our triangle is a little big, we can set the size to 90% when the green flag is clicked. And to create multiple cones we can use the repeat(12) block to create twelve clones. And finally, using a change color block(25) we can make each triangle a different color.
Step 4: Make a new variable and call it direction.
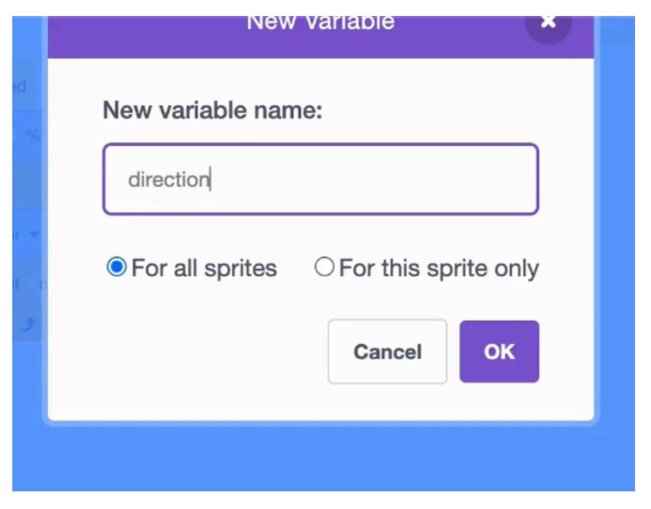
Go to the variable section, create a variable and name it direction. This variable will be used to show the direction of each of the triangle clones.
Step 5: The direction Variable
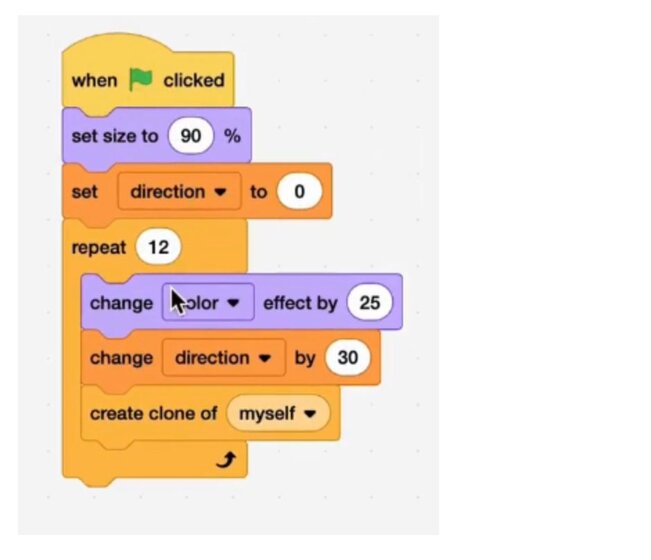
We will use the direction variable to set the direction of each clone.
Step 6: Set the direction of each clone
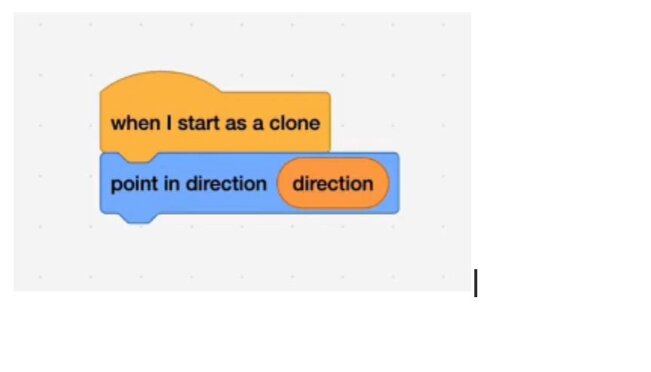
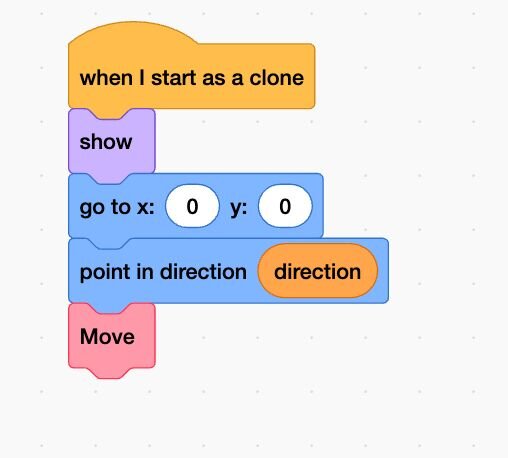
Using the when I start as a clone block, we can make the clones point in the direction that was set before they were made.
Step 7: Hide the sprite and show the clone
Since the original triangle isn’t doing much, we can simply hide it using the hide block. Since we’re hiding the original, all the clones will also be hidden, so we can put a show block under the when I start as a clone block.
Step 8: Set the position of each clone
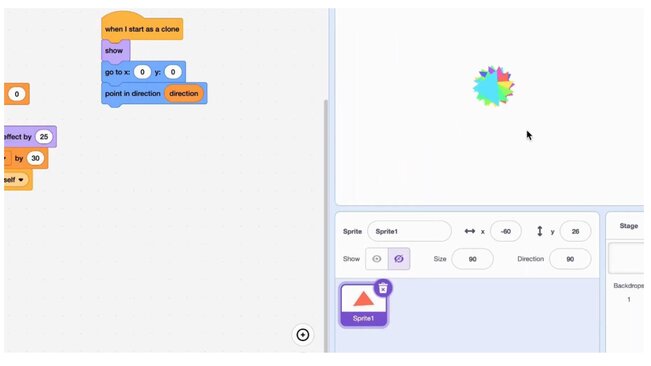
Let's place the clones together at the center of the screen. To do this, use the go to block and place each clone at (0,0).
So, now the clones are place together, but each of them will point in a different direction. Together, the clones will complete a full circle or 360 degrees.
Positioning them this way will help us create beautiful pattern by simply moving the clones.
Step 9: Build a move function to program the arrow keys
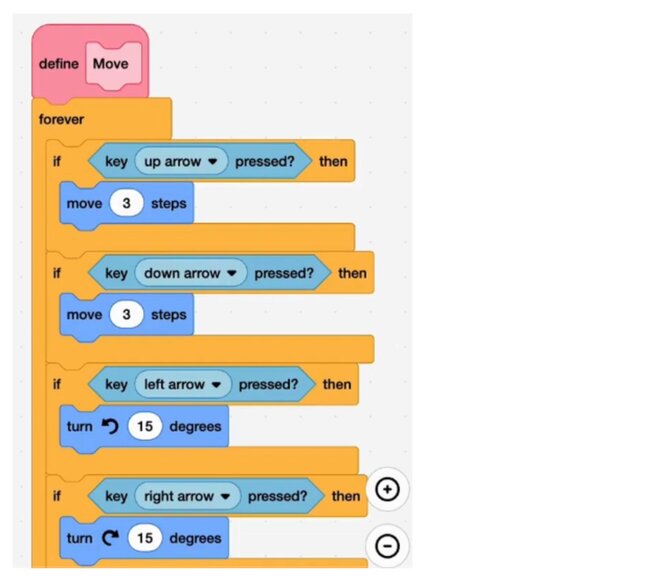
We'll create a move function to program the four arrow keys. Create simple movement using the move block when each arrow key is pressed.
We build a function to do this since the function can be used to give this functionality for each clone.
In this example, creating a function makes the code more elegant and readable.
Step 10: Add movement to the clones
Now that we have the move function, we can simply call the function whenever a clone is created.
You can use the block with the name of the function to call it.
Go to the my blocks tab in the Scratch interface to get the move function block that you have created.
Step 11: Add a backdrop
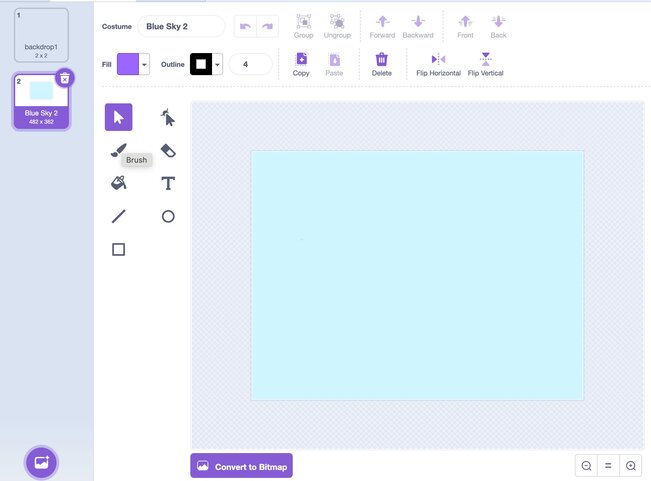
Let's add some color to our animation. Add the blue sky backdrop from the backdrop library or you can paint your own with your favorite color.
Step 12: Check out the Kaleidoscope animation
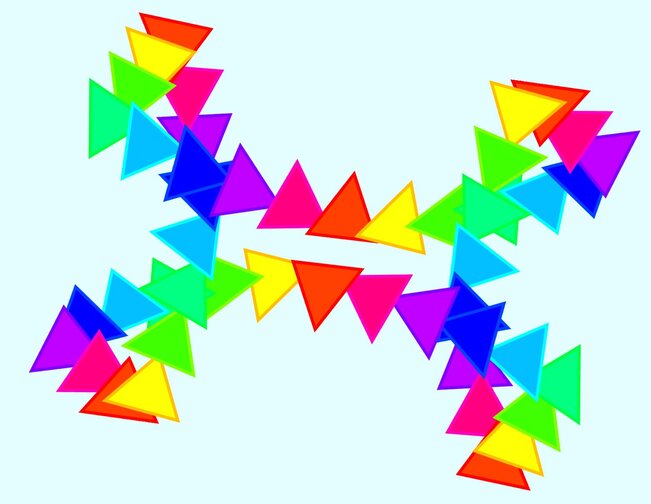
The Kaleidoscope animation is now complete. Use your arrow keys to check it out!
Step 13: Let's change the settings of the animation
The current settings of the animation include:
Change these settings and see what happens. For example, you can make 48 clones and 7.5 degrees rotation interval.
Also, see what happens if the rotation intervals don't add up to 360 degrees.
You can also change the color effect, sprite, size of the sprite and add your own additional features to make this animation more exciting and fun!
Full Video Tutorial : Kaleidoscope animation in Scratch
Here is a full video tutorial to build your own star animation in Scratch.
Next Steps
Hope you had fun building this animation. We have another exciting Scratch animation project that you can build on your own Planet Animation with Scratch
Want to learn Scratch with us? Sign up for our Scratch Programming online class.