Kodeclik Blog
Tutorial: Scratch Project to build your own Backpack
In this Scratch project, we will create a program that rapidly shuffles through various color combinations for a backpack so that you can click a button and settle on a combination for your own use.
For this project you are going to need a Scratch account. It is free and you can create one by going to the Scratch homepage. Login to your account and create a new project. Once you have done this, follow the steps below to complete the activity!
Step 1: Create the backpack sprite
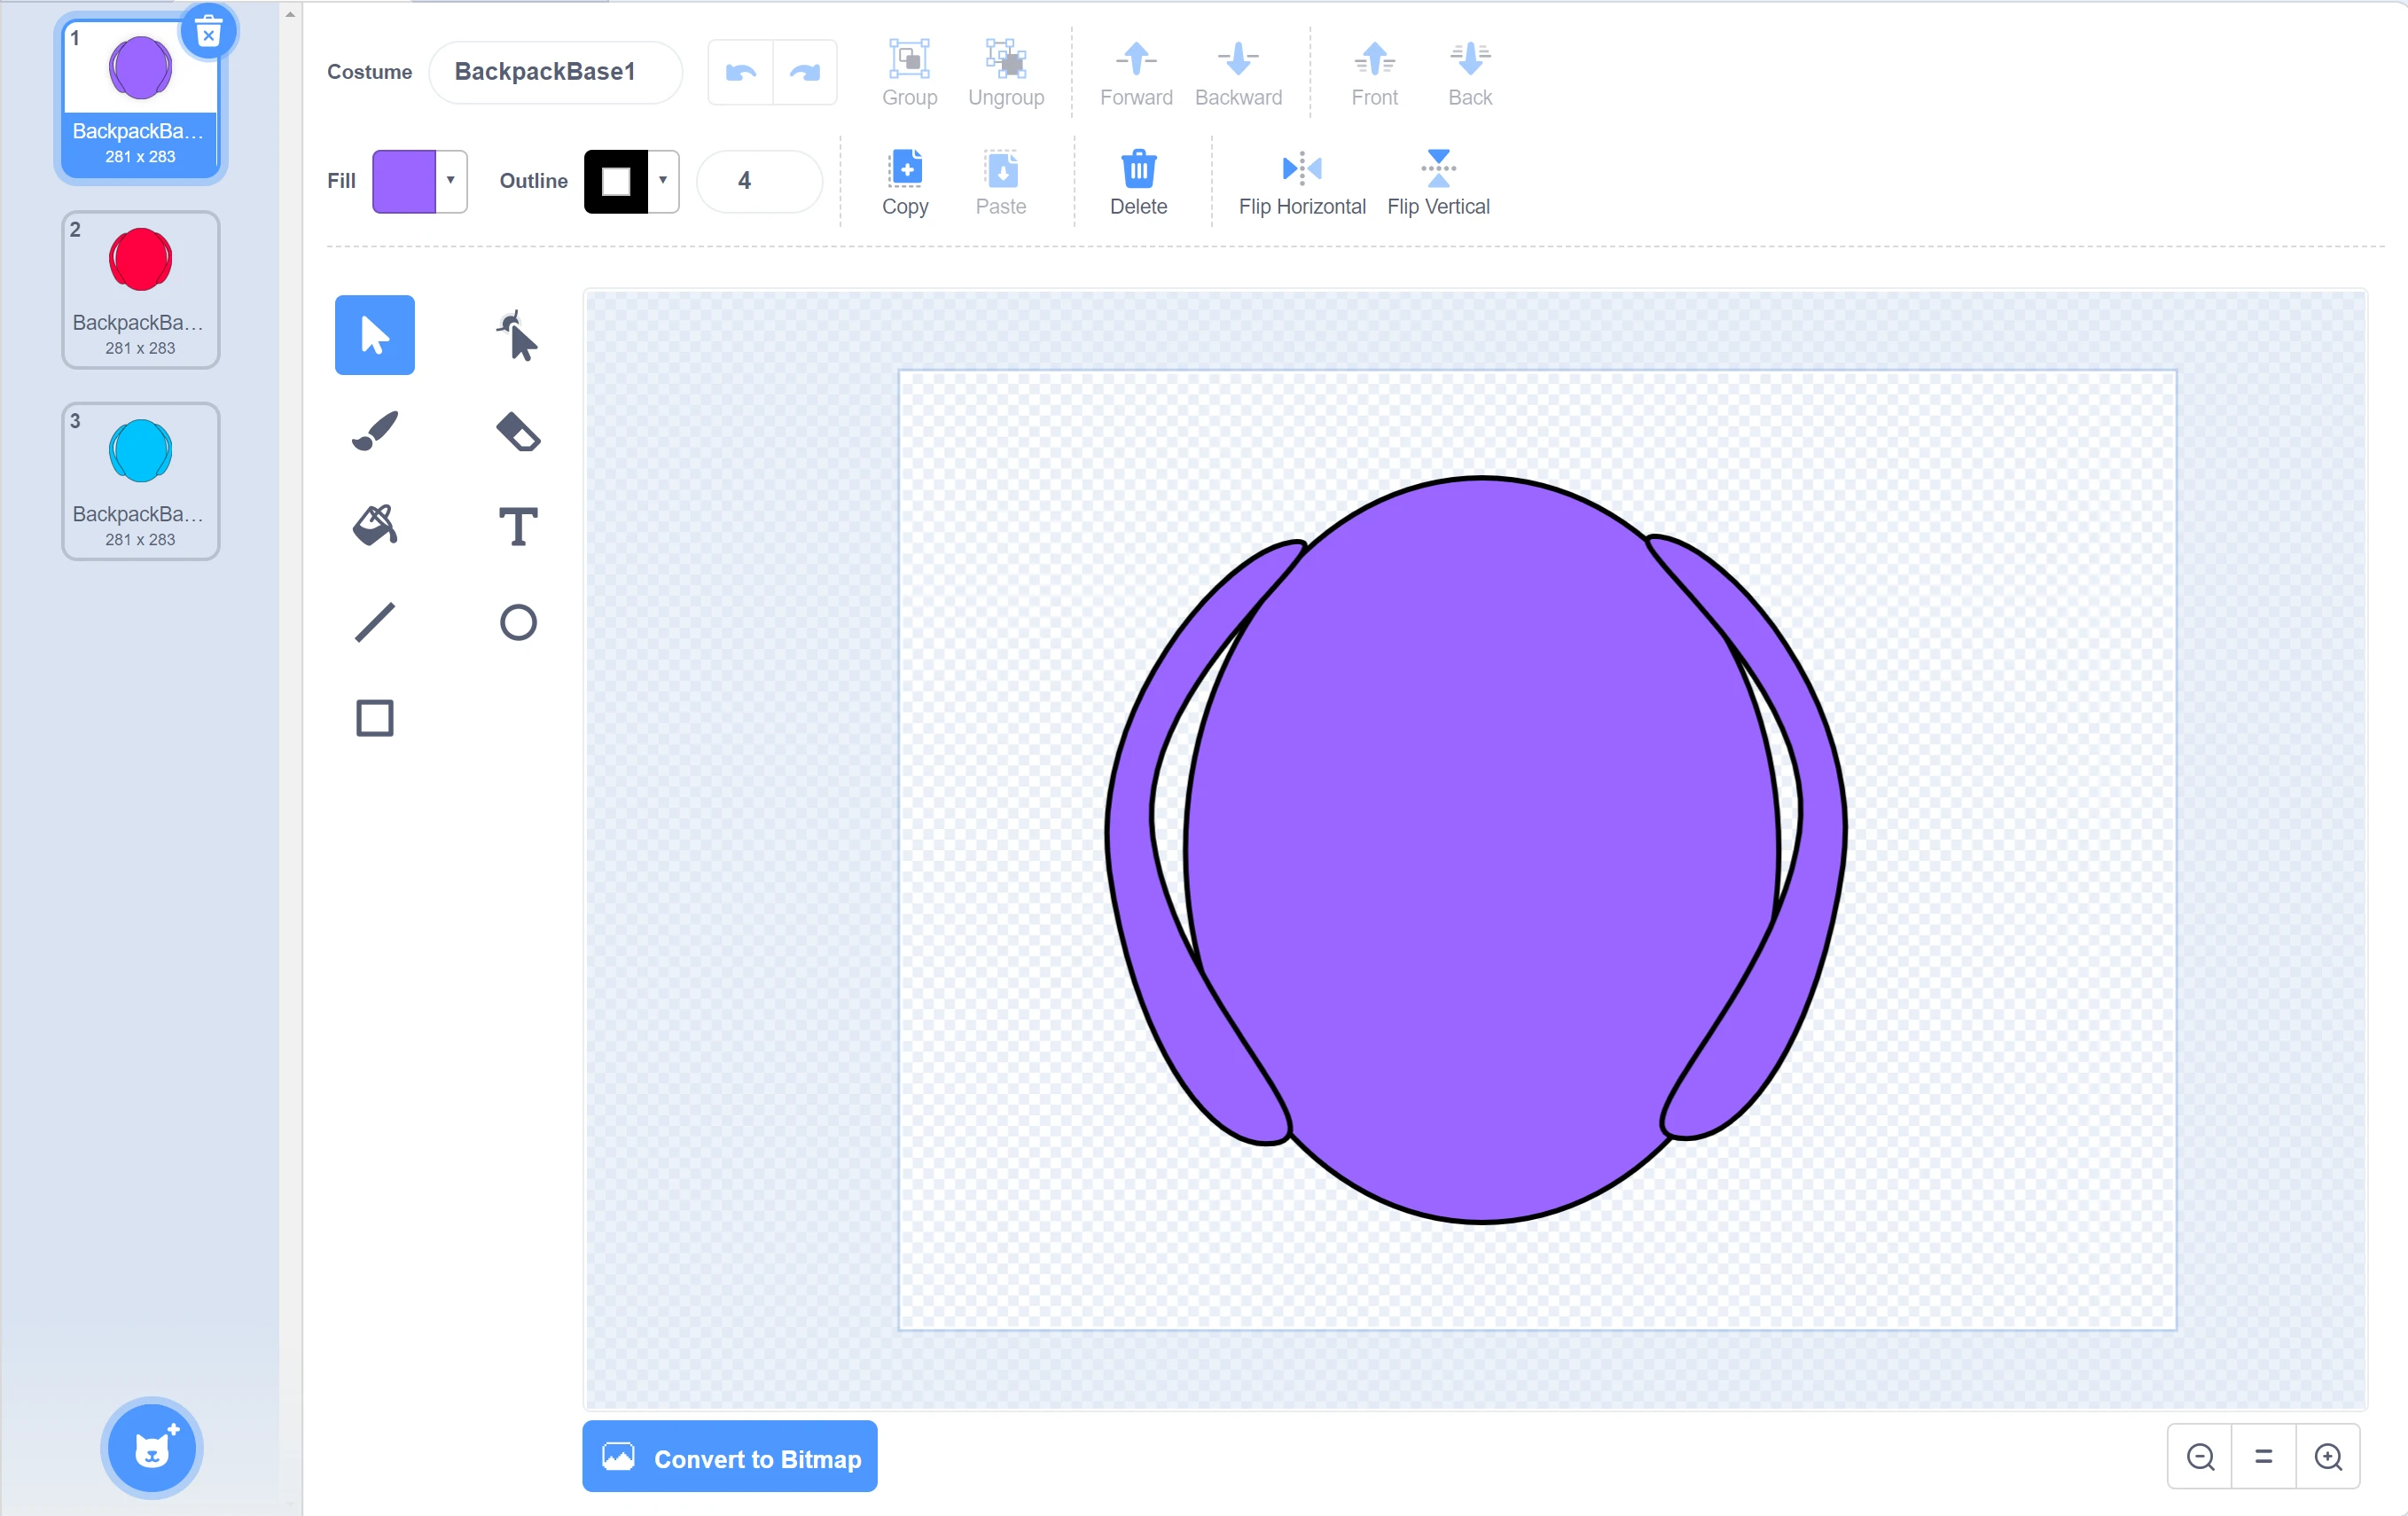
To start, let's draw our sprites. We are going to create our own sprites. Hover over the sprite icon and then select the paint button. Use the circle tool and draw a nice simple oval for the base of the backpack. Make smaller ovals along the sides and click on the button on the side that has a mouse with a dot. Use this tool to reshape the edges and get a handle for your backpack.
Once you have one handle, copy and paste it and rotate it or flip it with the tools at the top (to be able to use these features you may need to be on the starter mouse tool). Duplicate this sprite in the editor and do this a couple of times to get as many costumes as you want. Then, recolor the images to give variety to the types of backpacks available. Name this sprite: “Backpack Base”. It should look like the below (note that we have made 3 costumes for the backpack, in different colors; you can have more costumes if you like).
Step 2: Create the Zipper
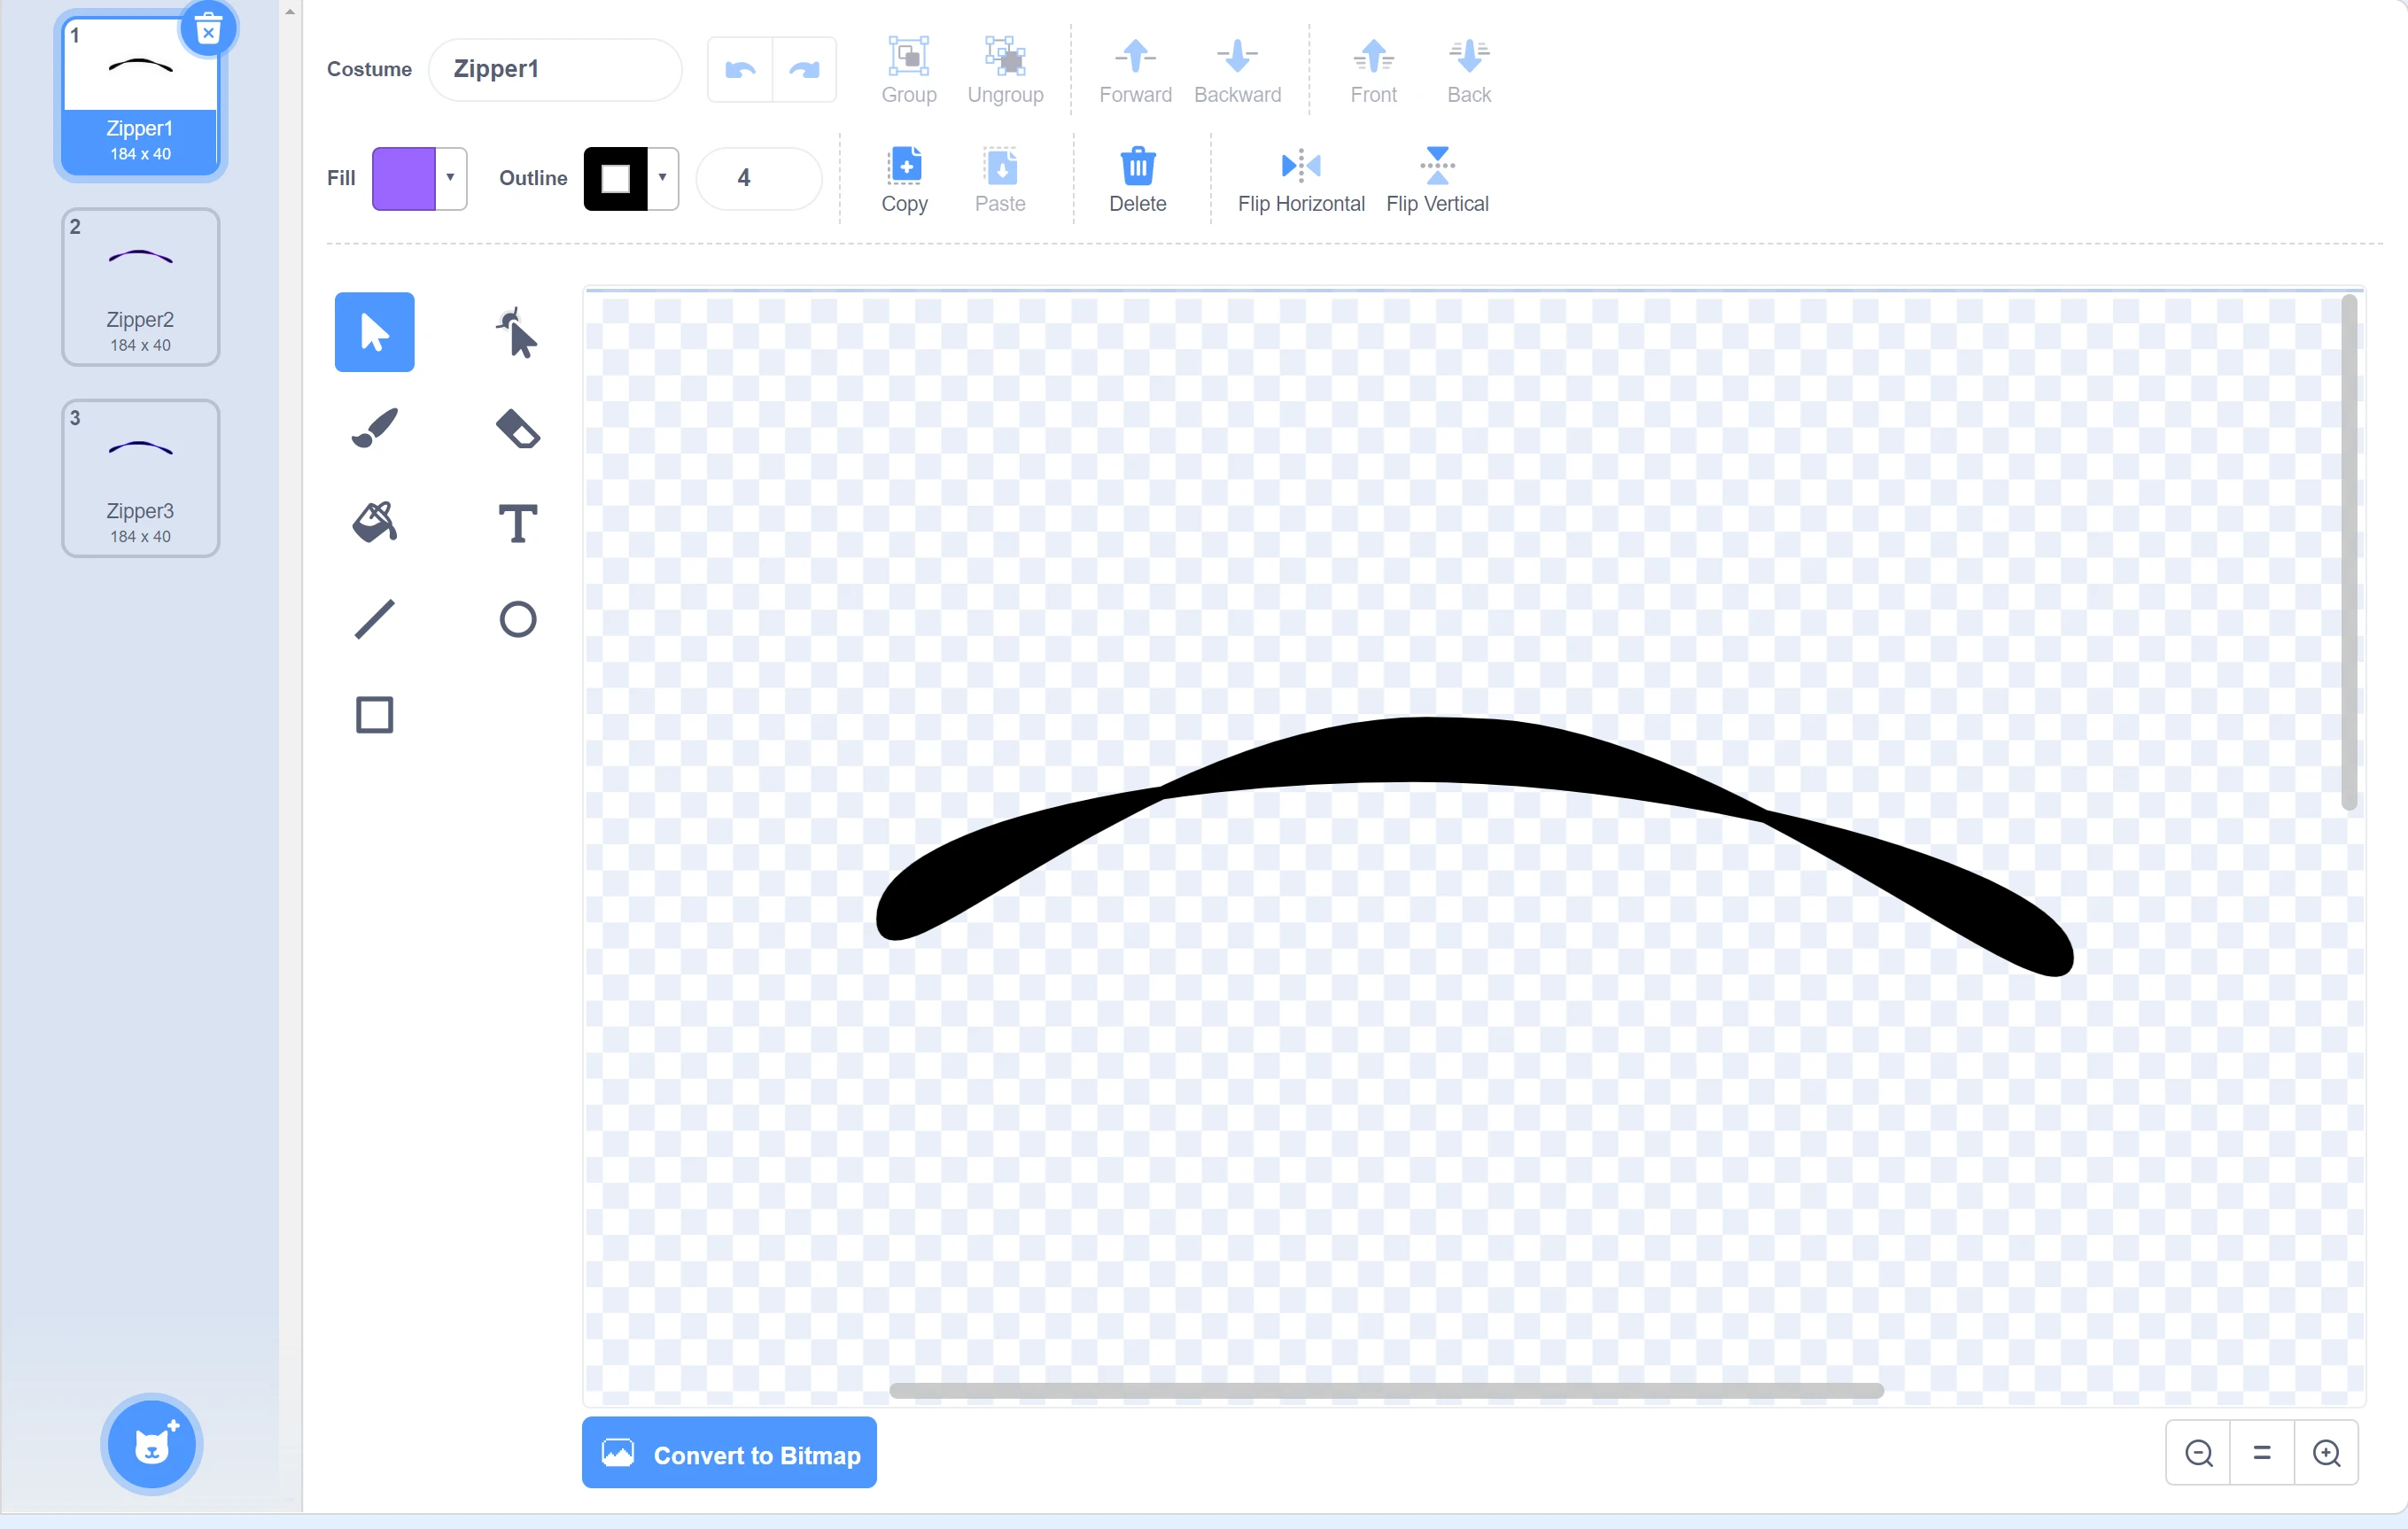
Next, let us make the zipper. Create a new drawing sprite. Create a thin oval on its side and put it at the top of your screen so that it is in the right place on the backpack. Then use the dot pointer tool to intersect the edges to make it look like a real zipper. Then add various types of colors and rename the sprite to “Zipper”.
Step 3: Make the Zipper Handle
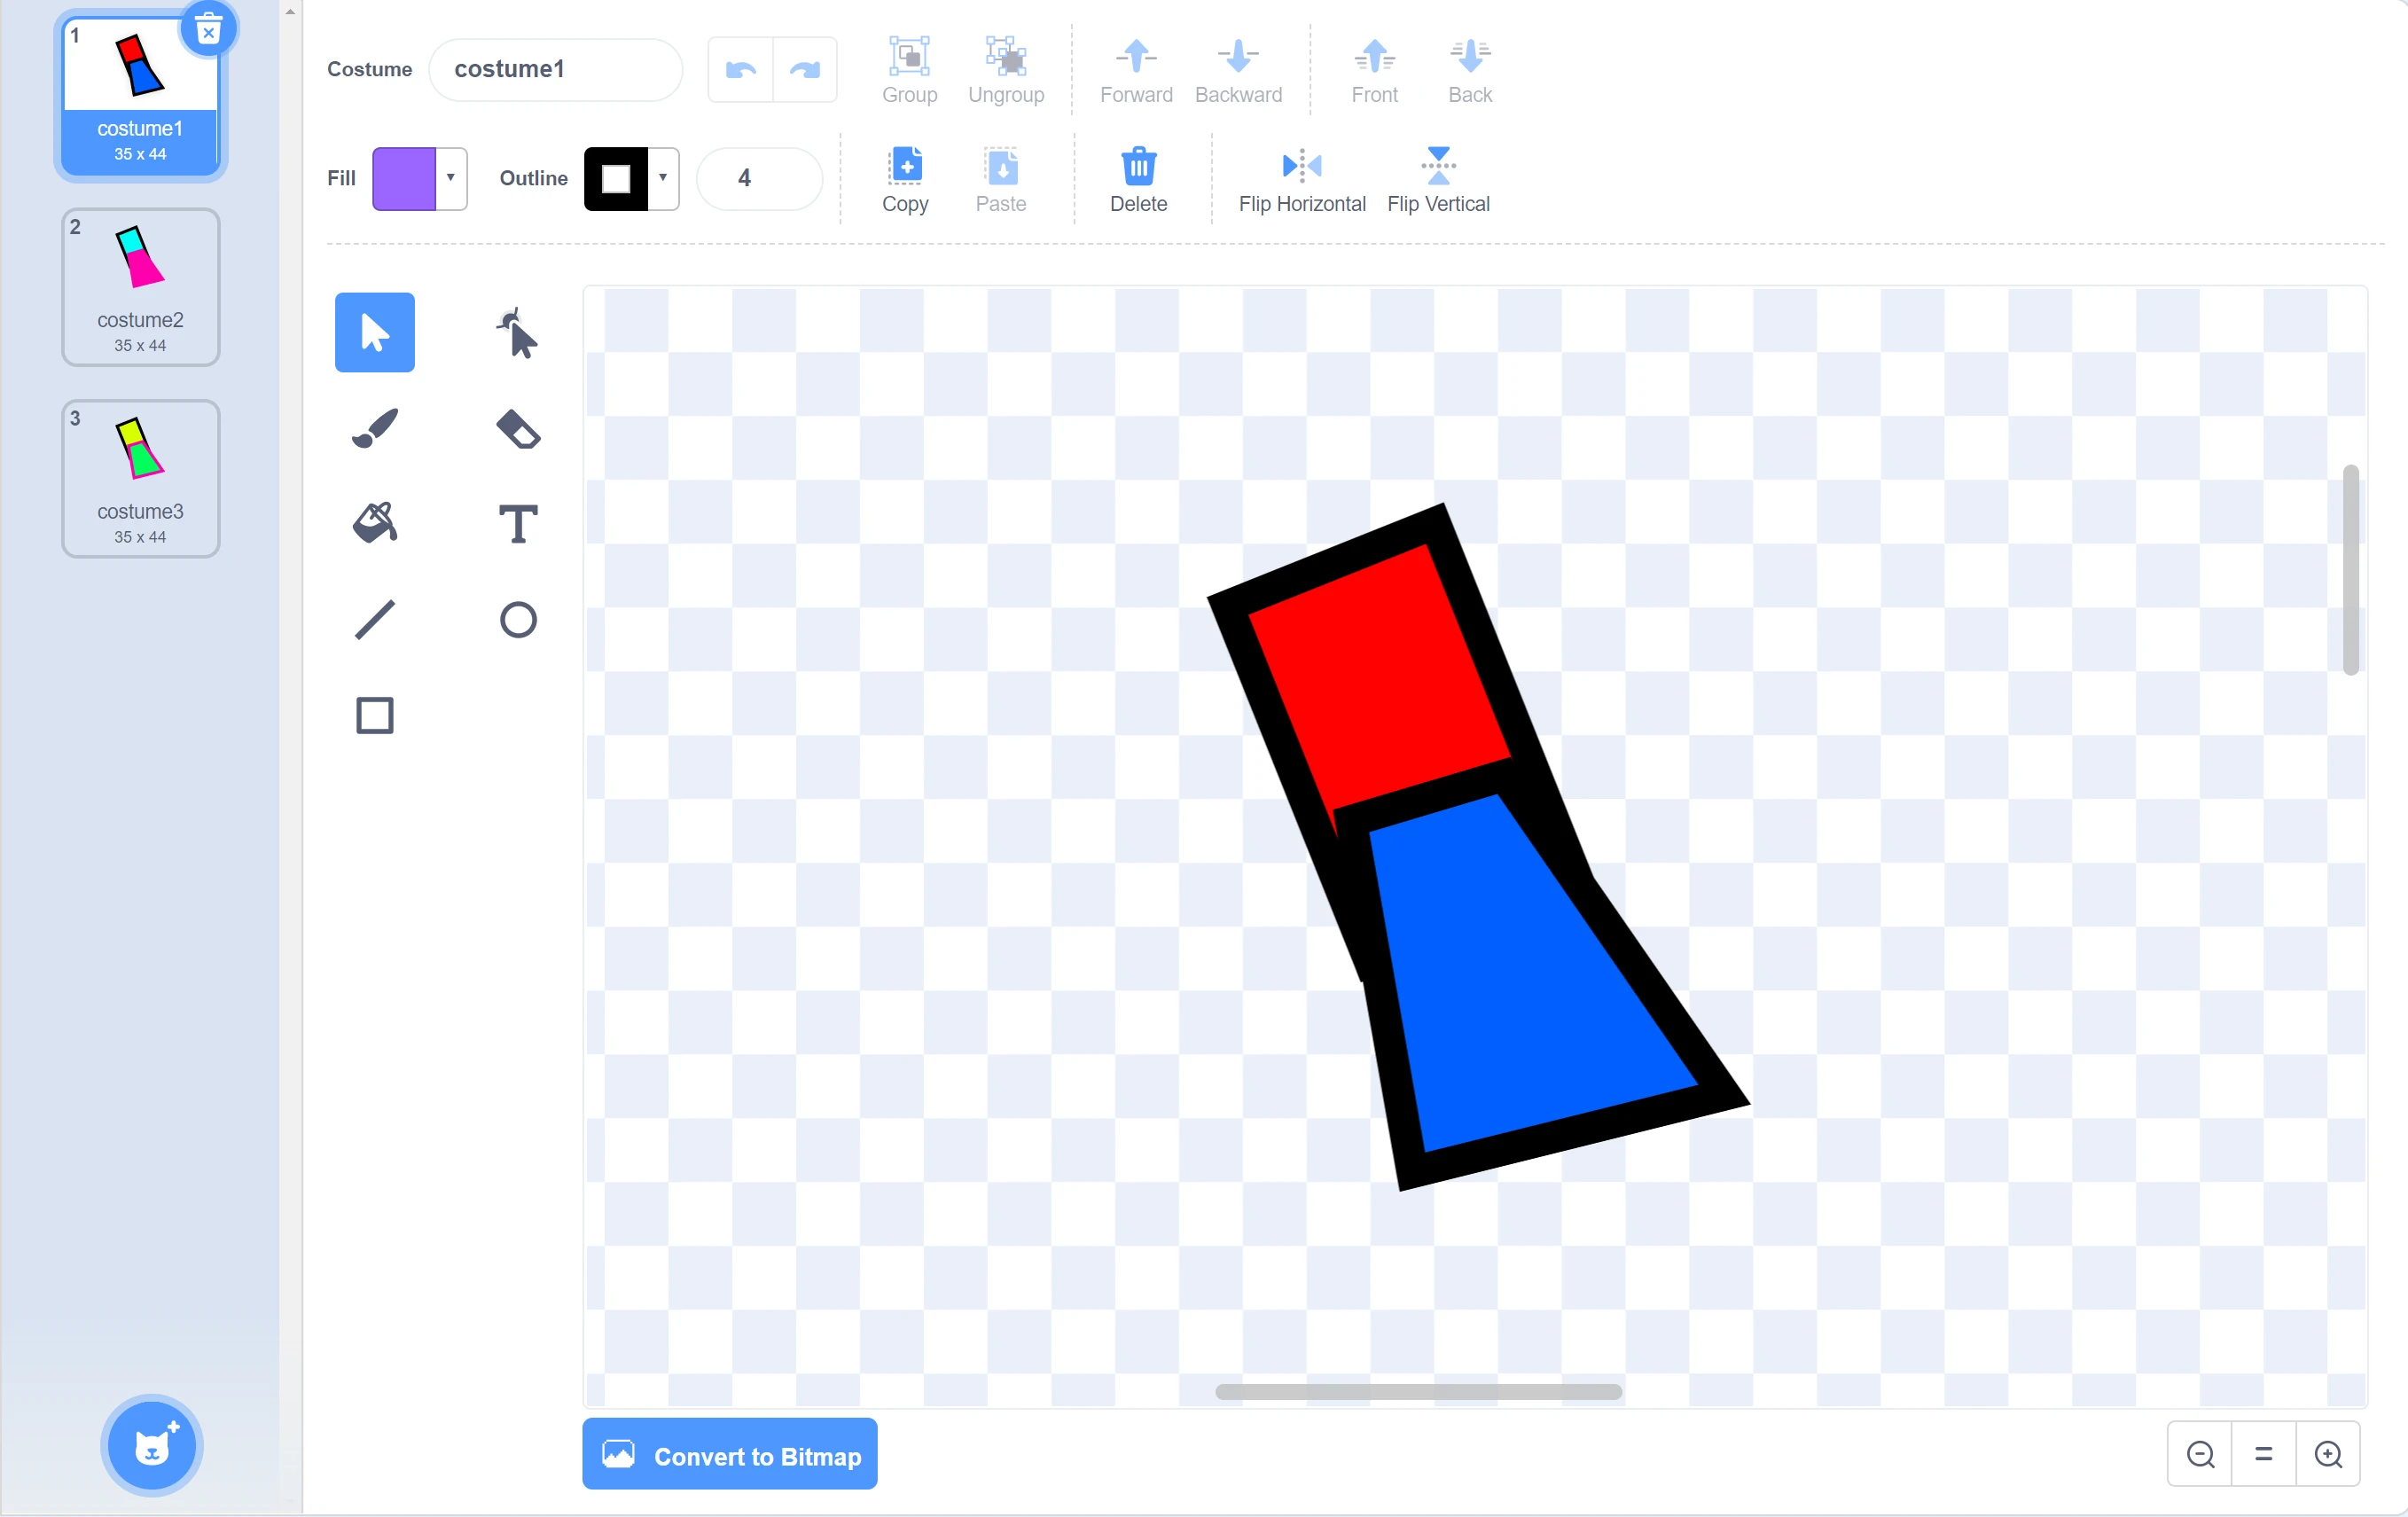
Next make a sprite called “ZipperHandle”. Draw it to look just like a Zipper’s handle and position it correctly. Then, as usual, make a few colored variations. In the example below, we have 3 costumes.
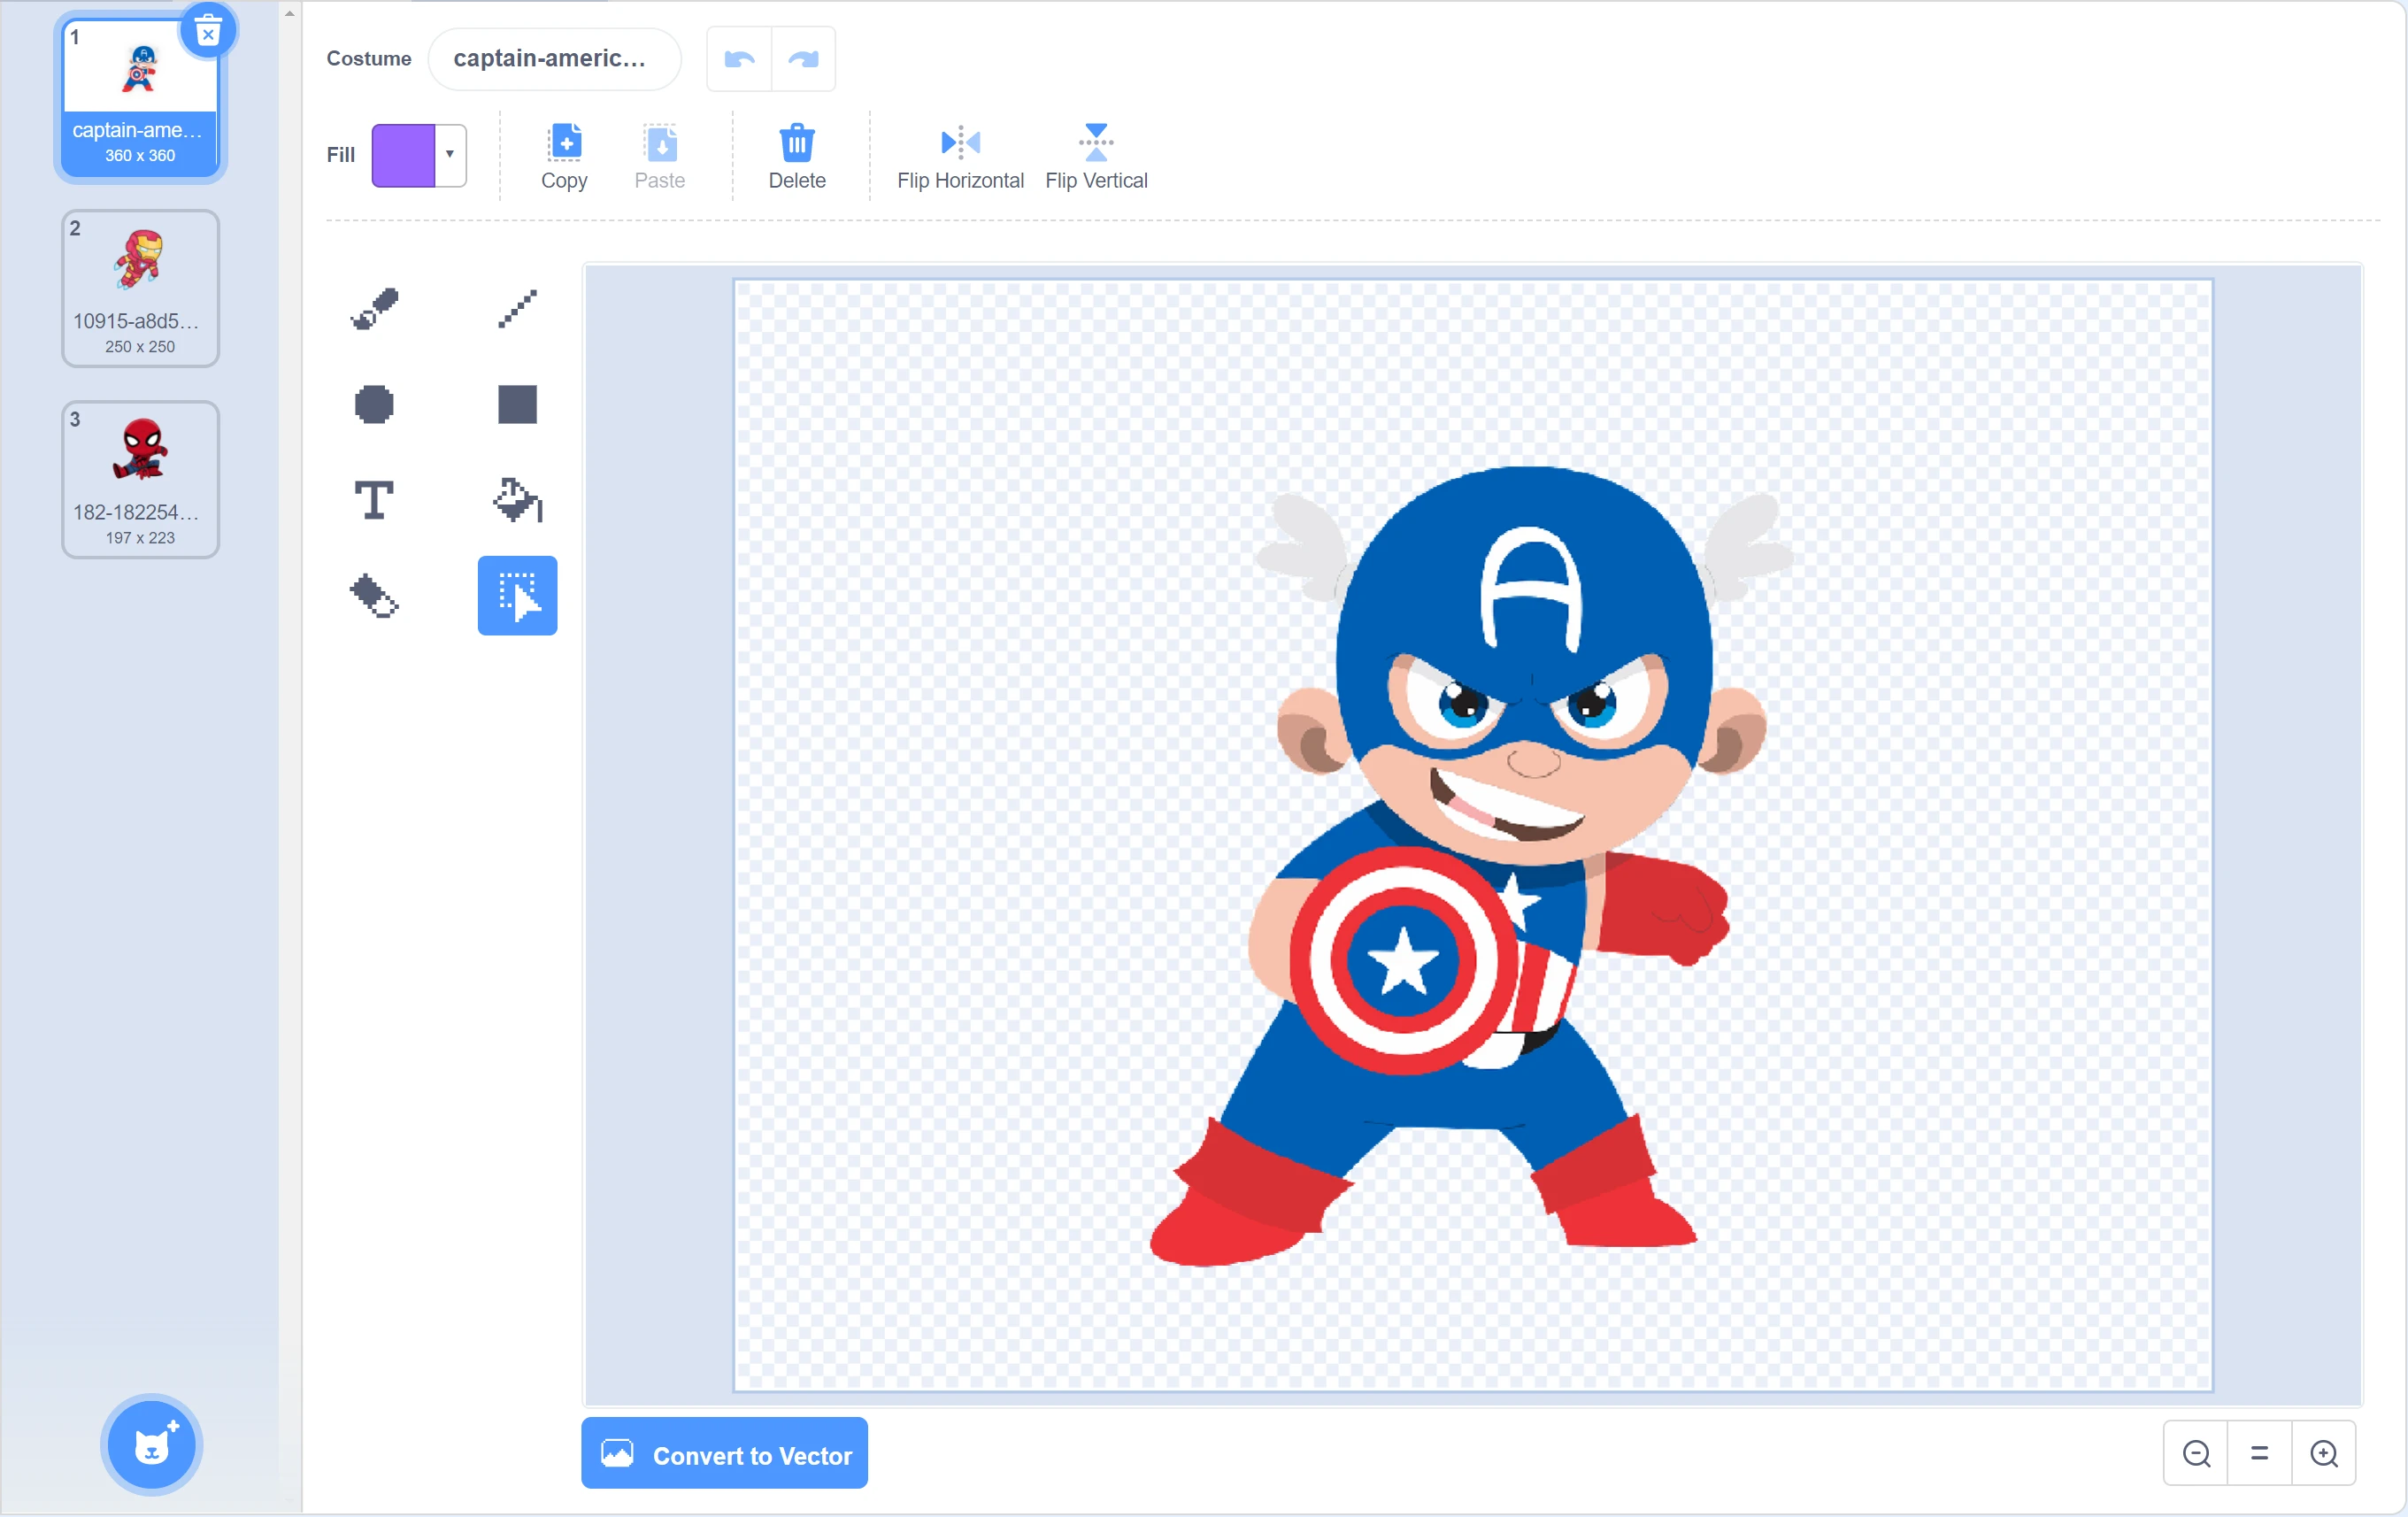
Step 4: Import superhero sprite for backpack design
Next, import the sprites you want the theme of your backpack to be. You can choose your own characters or patterns to use!
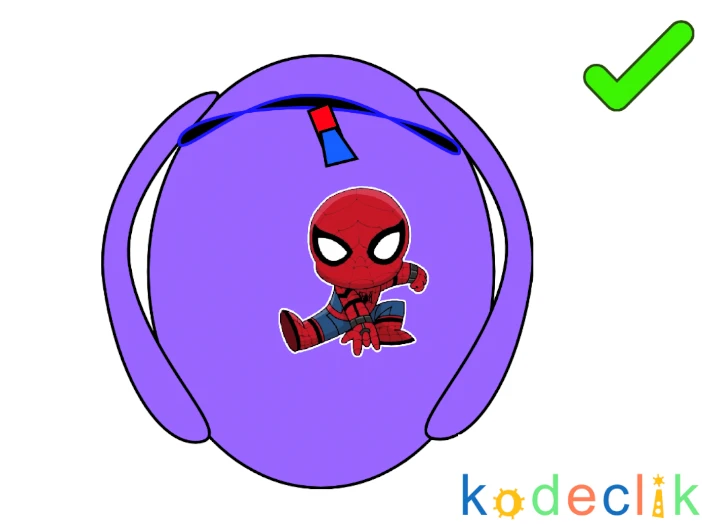
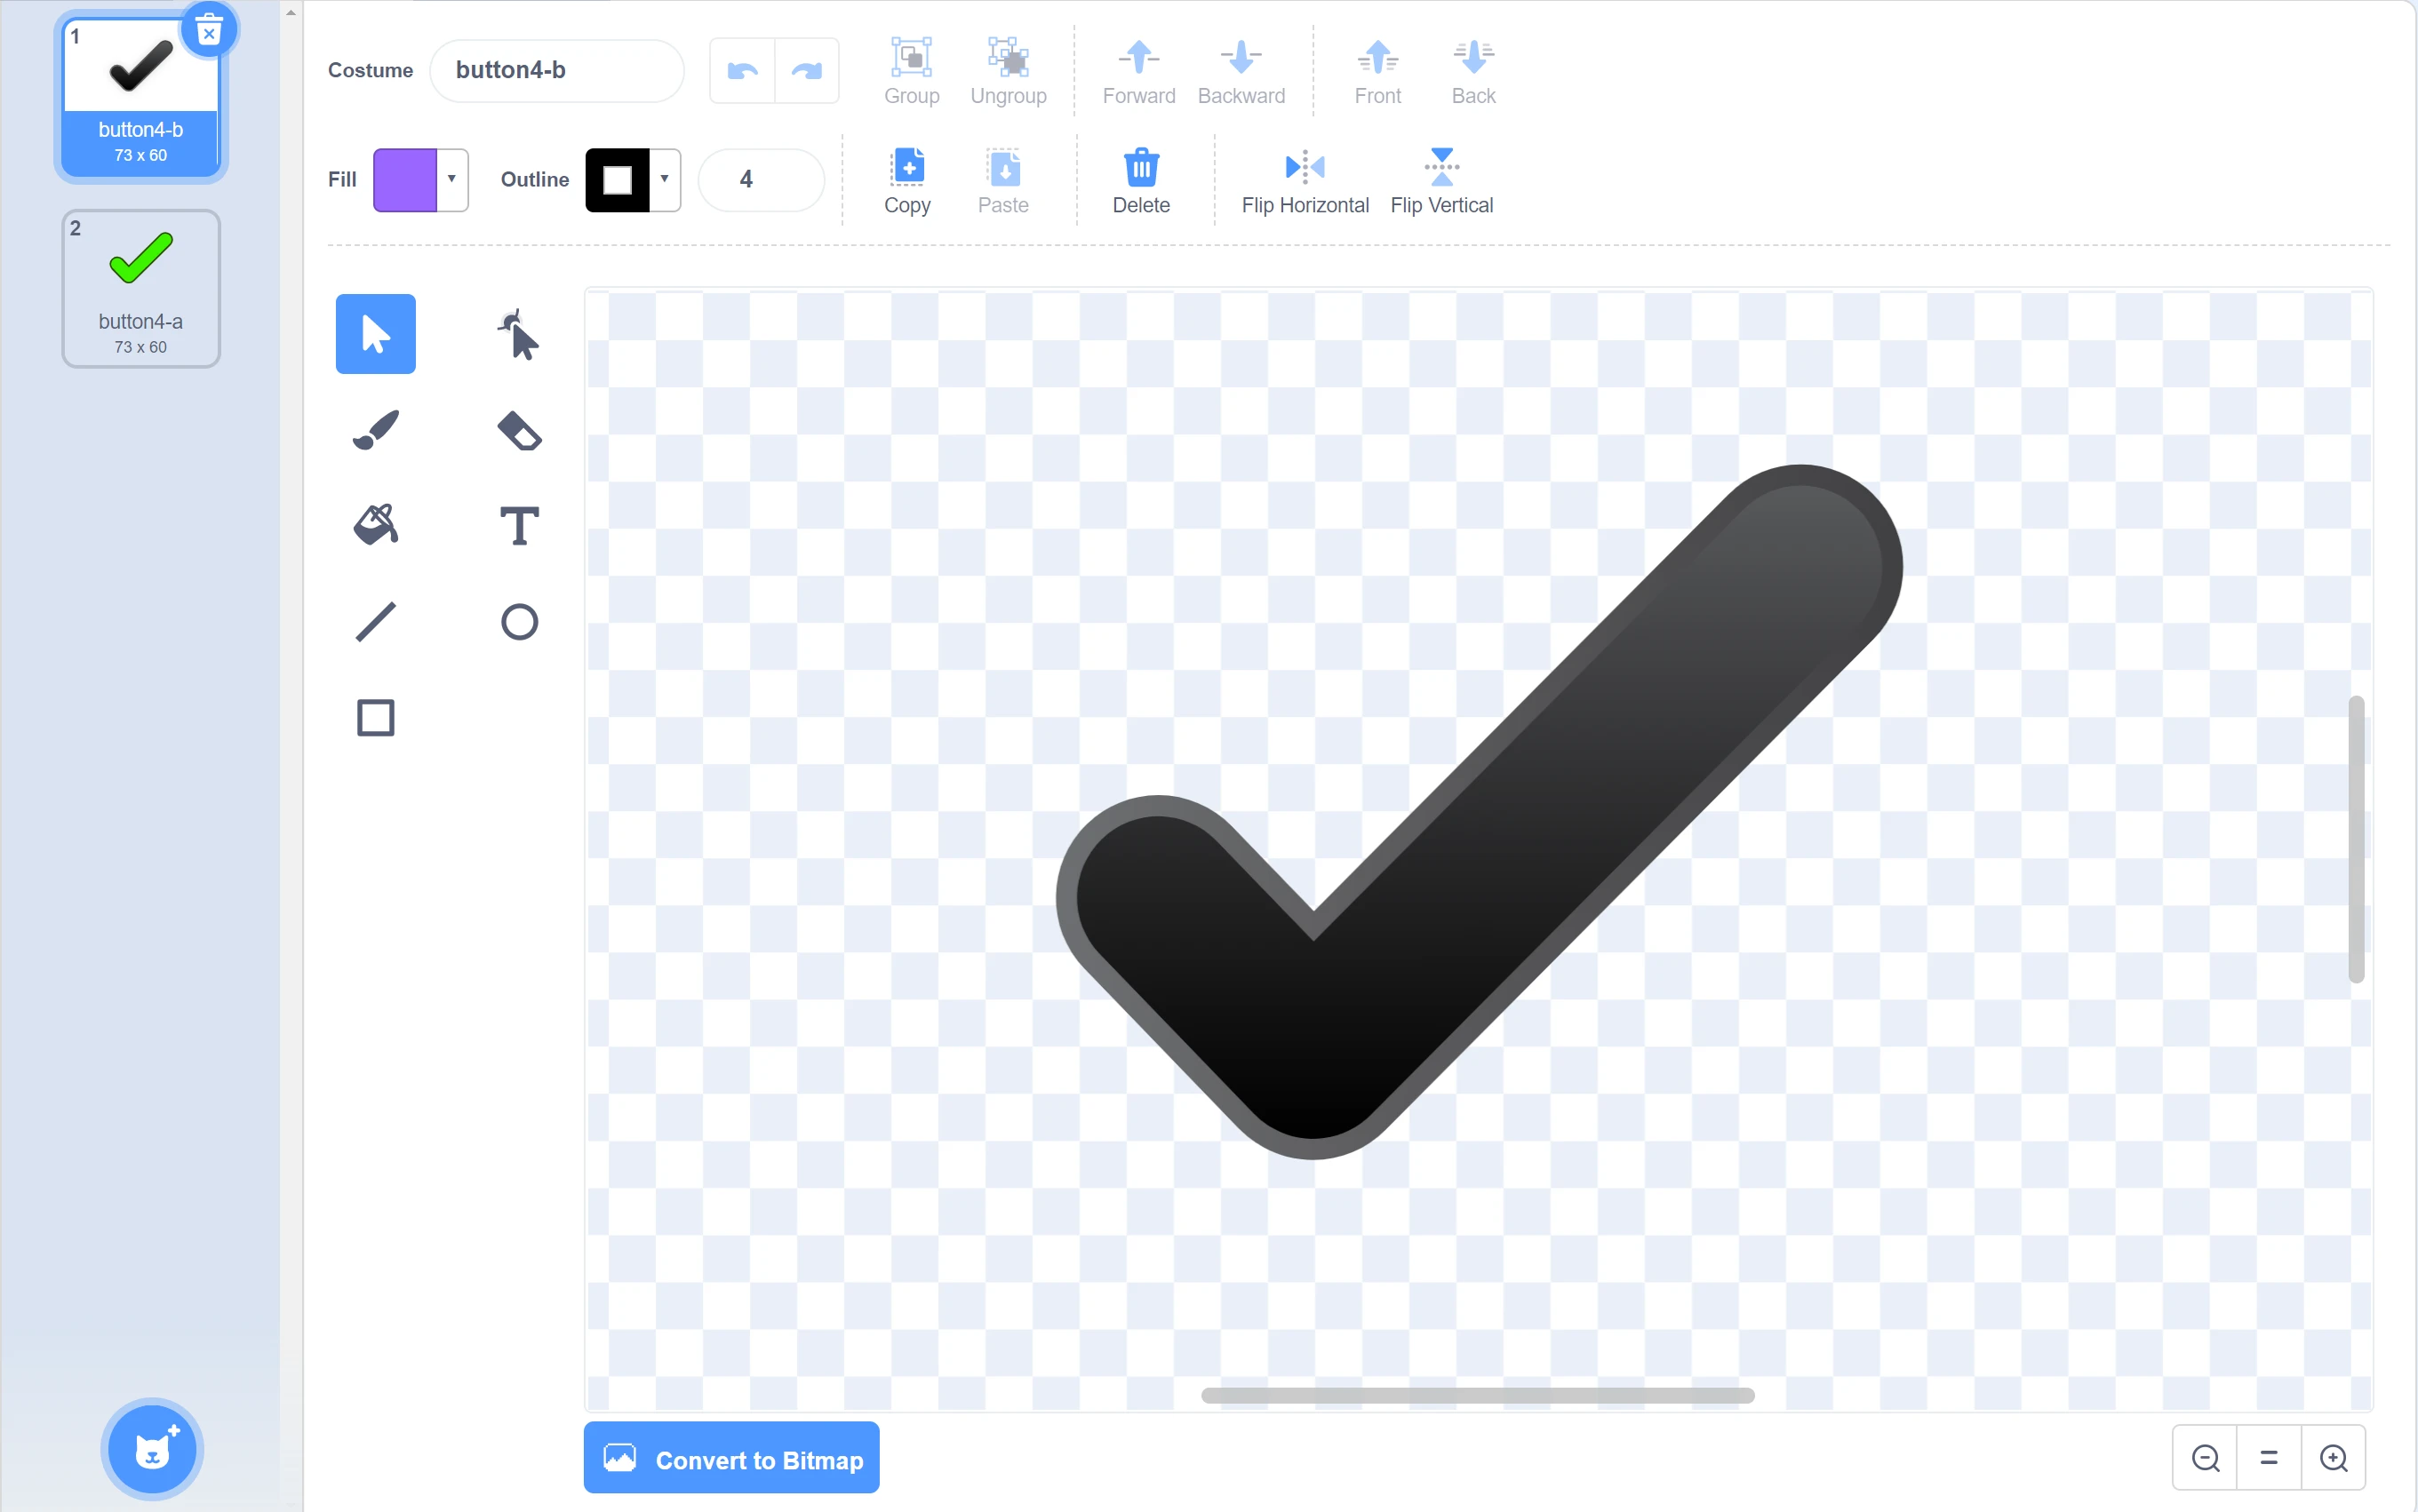
Step 5: Create the finish button
Finally, go to sprites and search up “Button4”, click the checkmark sprite that pops up and in the costume editor, use your mouse to reorder them so the black version comes first.
Step 6: Coding the Game
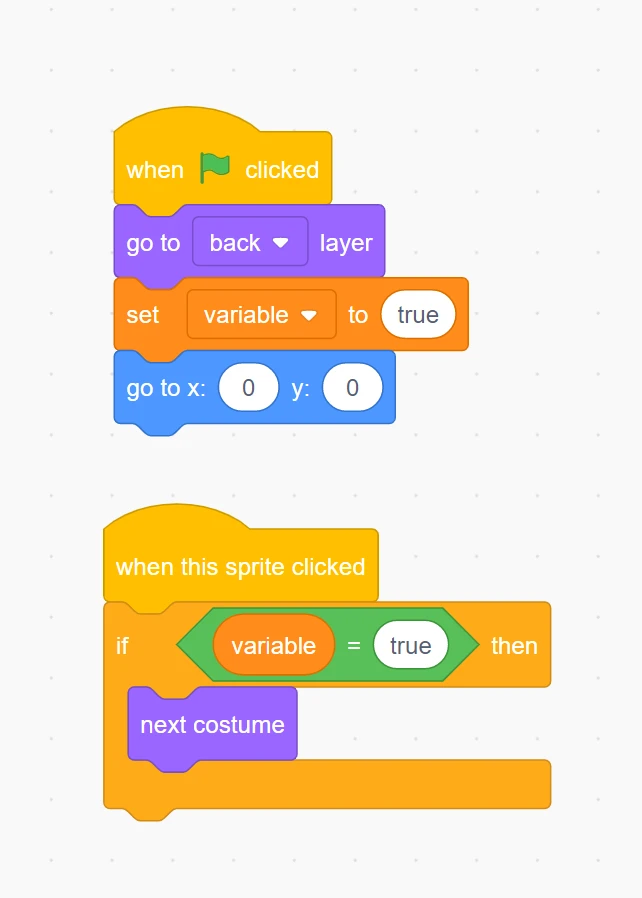
Now let’s move onto the logic. First, to all the sprites, add the code below. This code checks when the sprite is clicked and if it is, it makes the sprite move on to the next costume that the sprite has to offer. If the sprite is on the last costume, the costume counter goes back to the start so the cycling through costumes continues indefinitely.
However, note there is also an if statement. We are checking if a certain variable is true, and only if it is we are running this code. The reason for this is because when the user click our done button, we want to remove the user’s ability to change the backpack any further. Create a variable and make sure it is for all sprites. Name it whatever you want. When flag clicked, we will set the variable to true and later on when we set it to false no more user interaction is allowed. Note: you may need to use the set layer to front or back block or some sprites won’t appear. Also in case you move the sprite add some code that will make the sprite go to zero, zero.
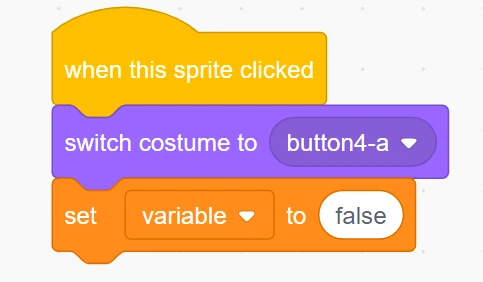
Next, go to the checkmark sprite, add the code below that checks when clicked, and if it is clicked, changes the button to green. We also change our variable to false so the player can no longer change the backpack.
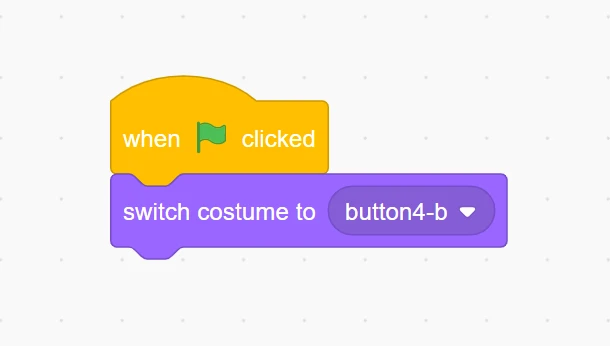
We also want to make sure that when the program is played again we set the sprite back to the black color. To do this we say that “when flag clicked”, set the costume to “button4-n”.
There you go! You are done with this project. You could add so many more things such as wearing the backpack and even customizing in different ways. We can’t wait to see your creations!
If you liked this project, learn how to make a clicker game in Scratch!
Want to learn Scratch with us? Sign up for our Scratch Programming online class.
