Kodeclik Blog
Geometric Design using Desmos
In this blog post, we will demonstrate a simple but compelling geometric design made by one of Kodeclik’s students using Demos. Desmos is like a graphing calculator but on the web. You do not need to create an account for creating this design but you will need to create an account to save your work.
To begin go to: https://www.desmos.com/calculator. Type in equations in the workspace on the left and the graph appears on the right.
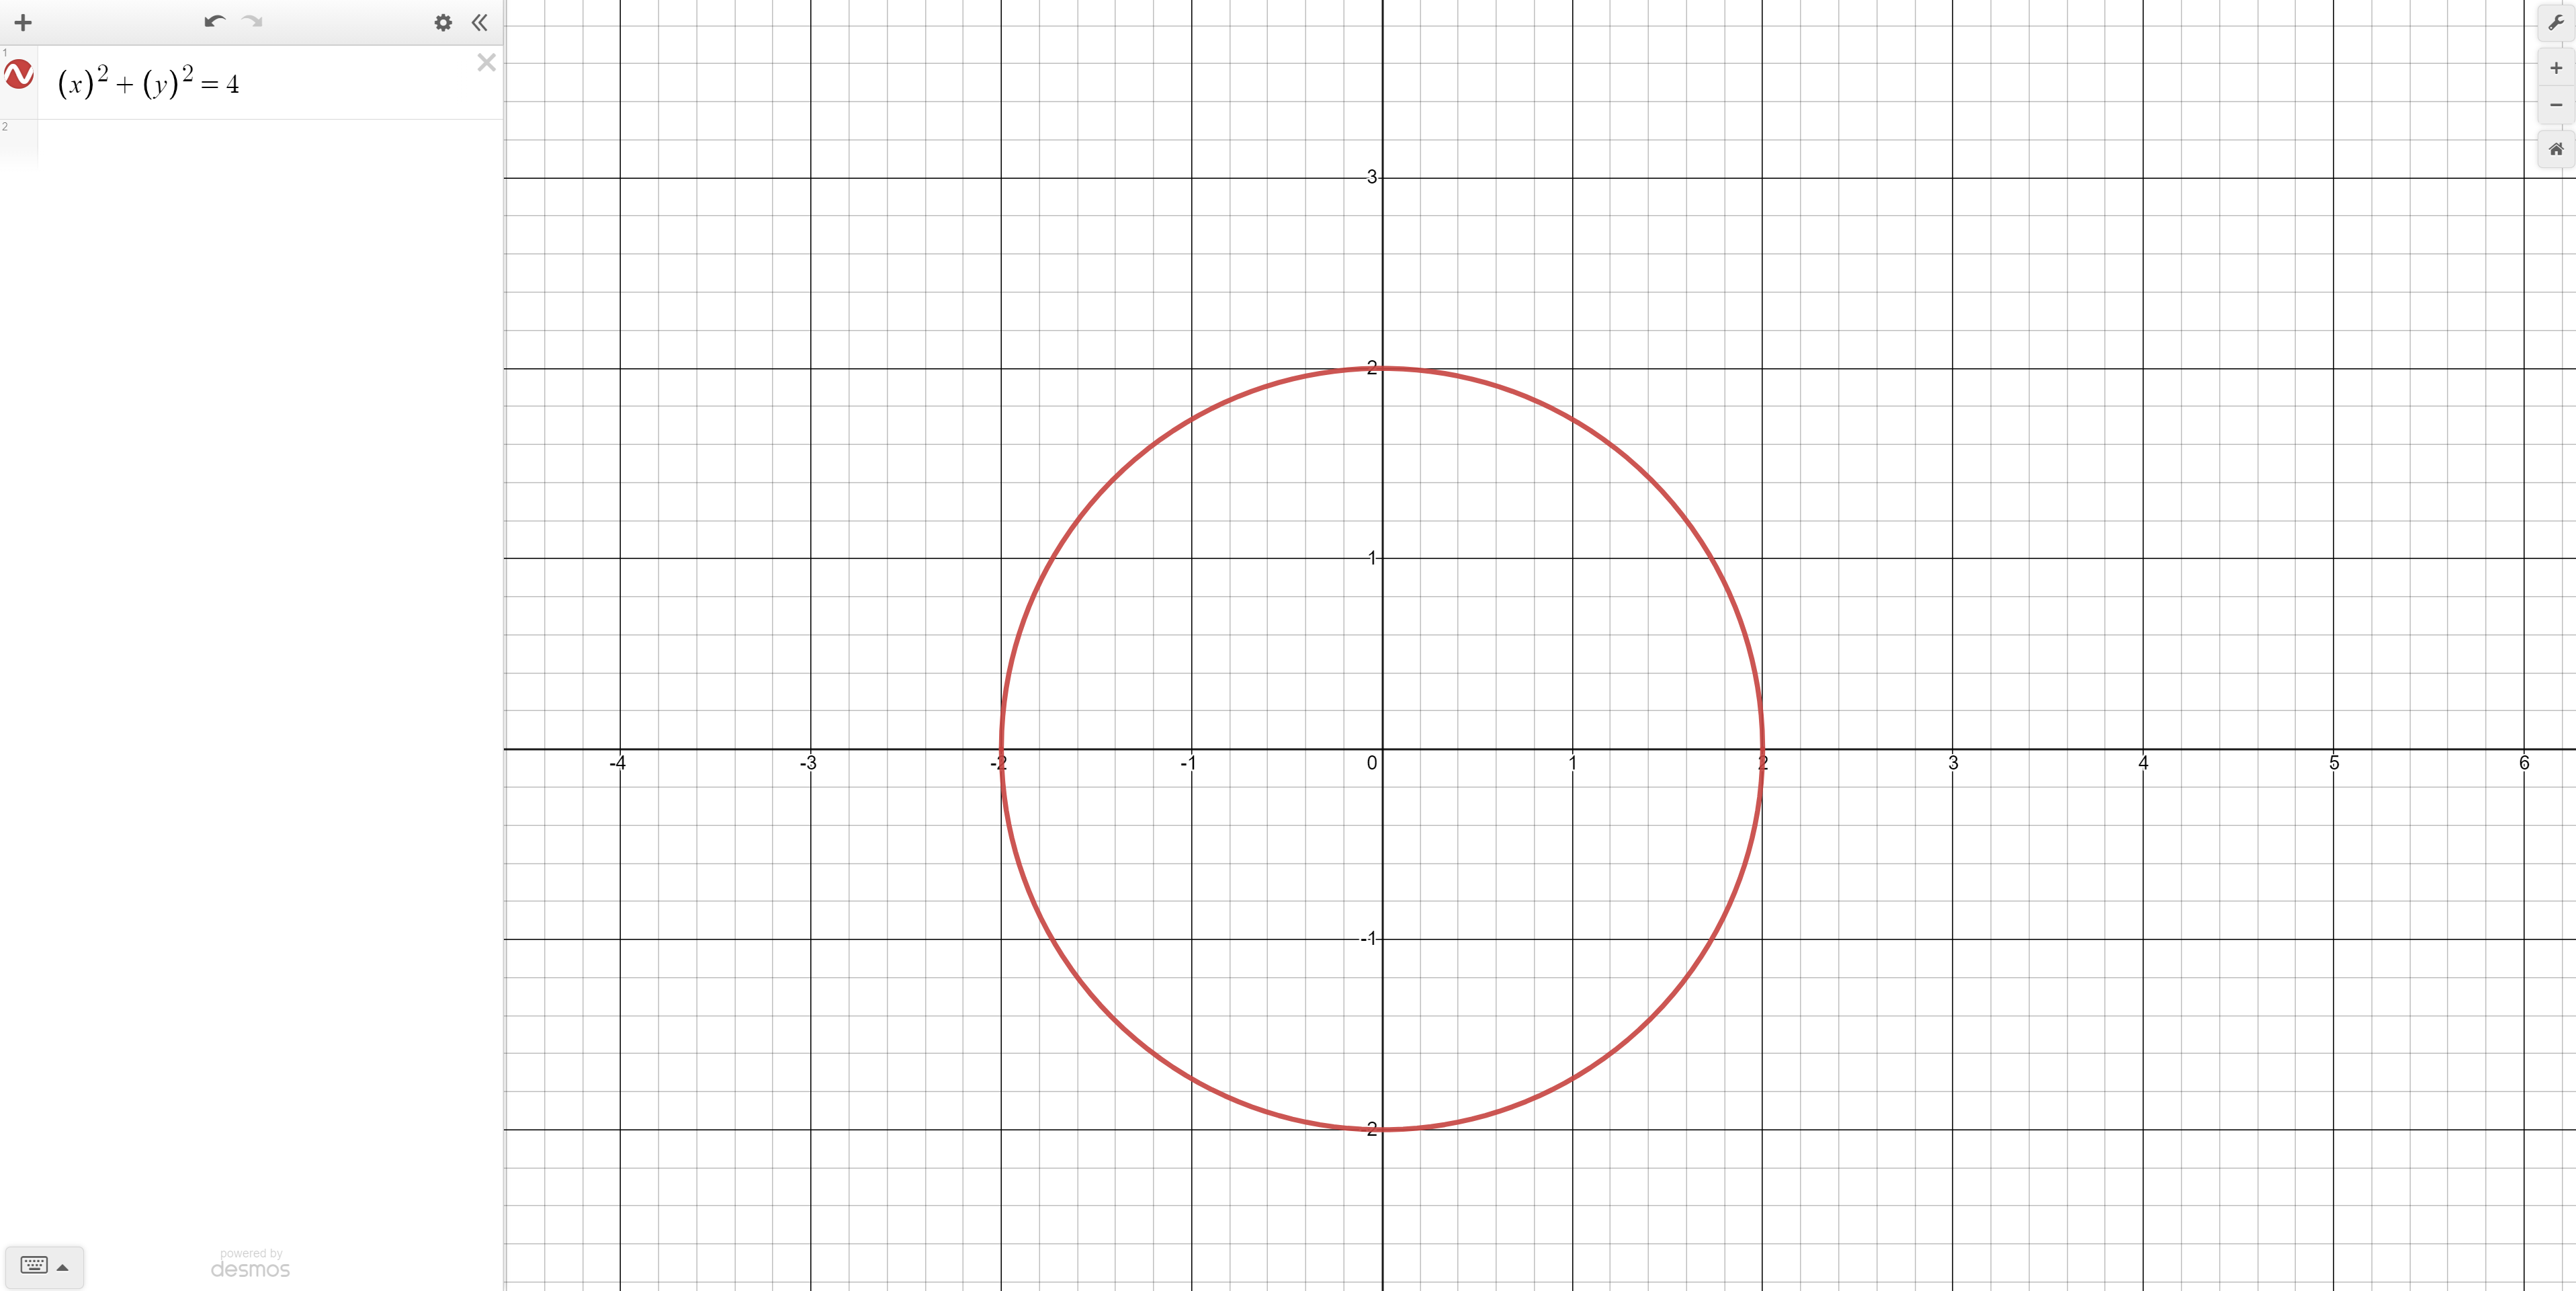
Step 1: Making a circle in Desmos
Geometric pattern design sounds complicated but really it is made of simple equations superposed on each other. A straight line can be drawn using a linear equation, a circle or ellipse or parabola can be drawn by a quadratic, and so on.
Desmos works in a two-dimensional cartesian coordinate system and so all equations we type will have “x” and “y” variables. We will do our geometric design systematically by adding one or few equations at a time.
Let’s start by making a circle around the origin. The formula for a circle is (x - c)^2 + (y - d)^2 = r^2. To make sure that the circle is centered around the origin we will leave the value of c and d as 0. The higher the r value (the radius) the bigger the circle so let’s make the r-value to be 2. Our final equation is therefore x^2 + y^2 = 2^2 or 4.
(Btw, understanding the properties of polygons, especially those with vertices on lattice points, can enhance your designs. For instance, Pick's Theorem offers a straightforward method to calculate the area of such polygons, which can be particularly useful when designing intricate patterns.)
Step 2: Making a geometric design inside the circle
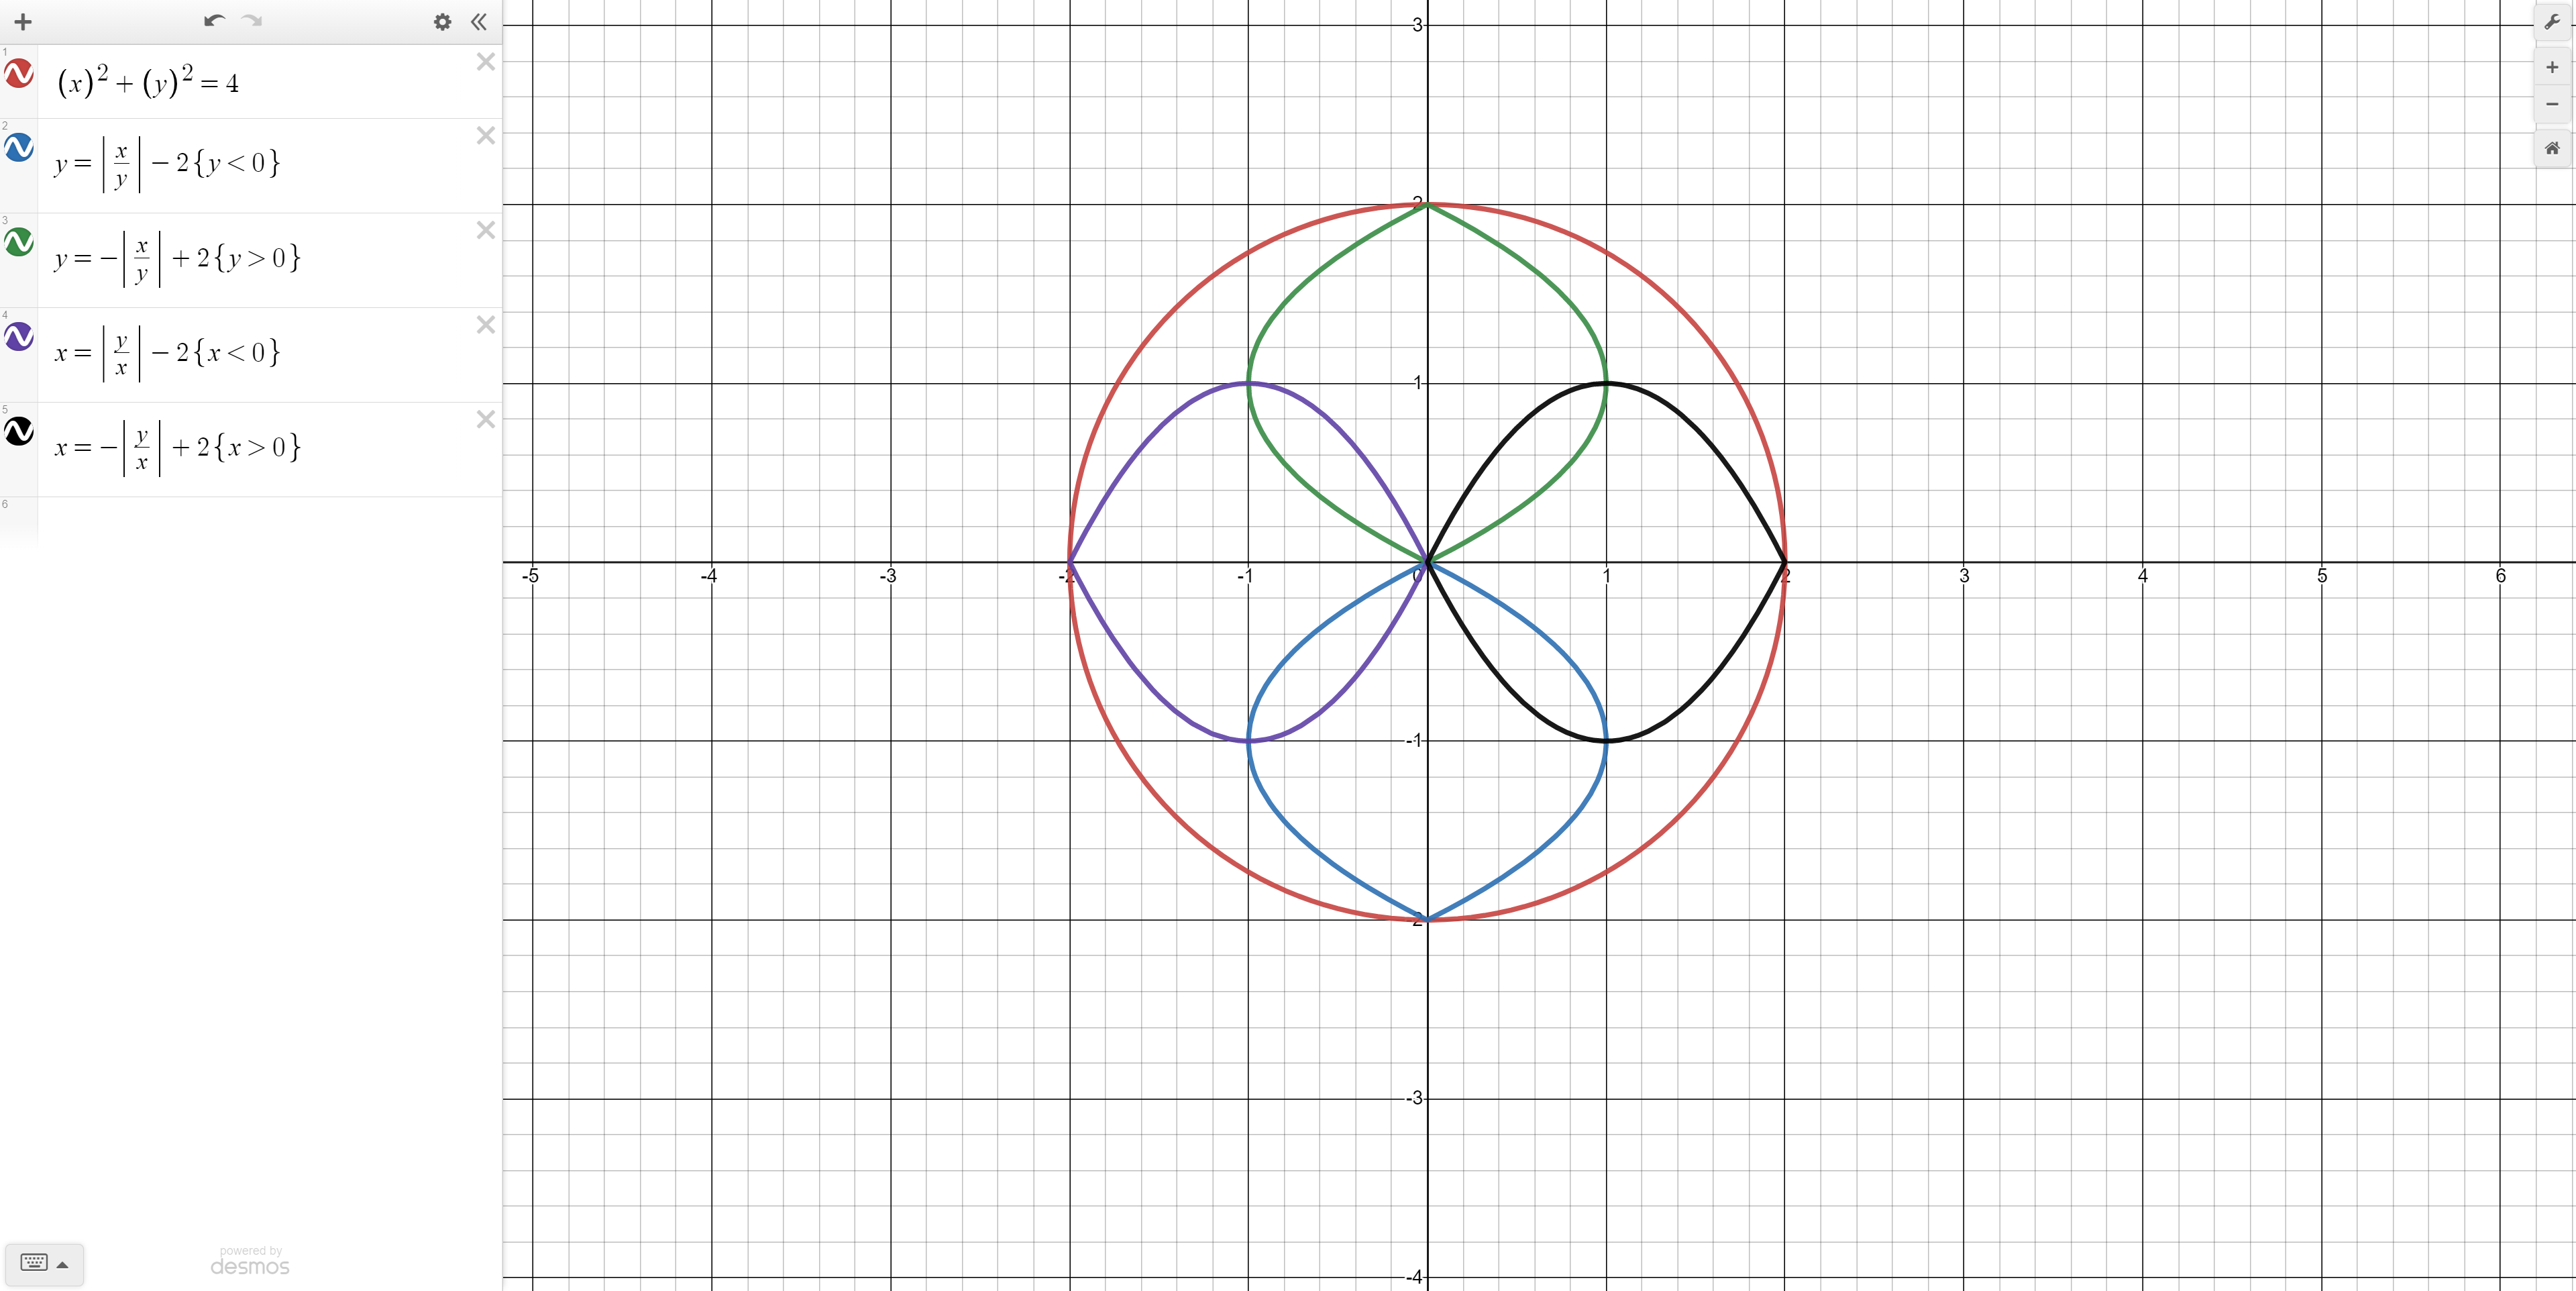
Next, let's make a pattern inside the circle. The equation y = (|x|/|y|) gives us a curved line. If we subtract 2 the line bends onto itself and gives another intricate design. Lets limit this design to only be below the x axis to remove the curved lines on either side. The equation therefore becomes y = |x|/|y| - 2, restricted to y less than 0. Let’s negate the absolute value and add two instead and we get the opposite. Finally invert both functions to get the same design as shown above (note: colors may vary).
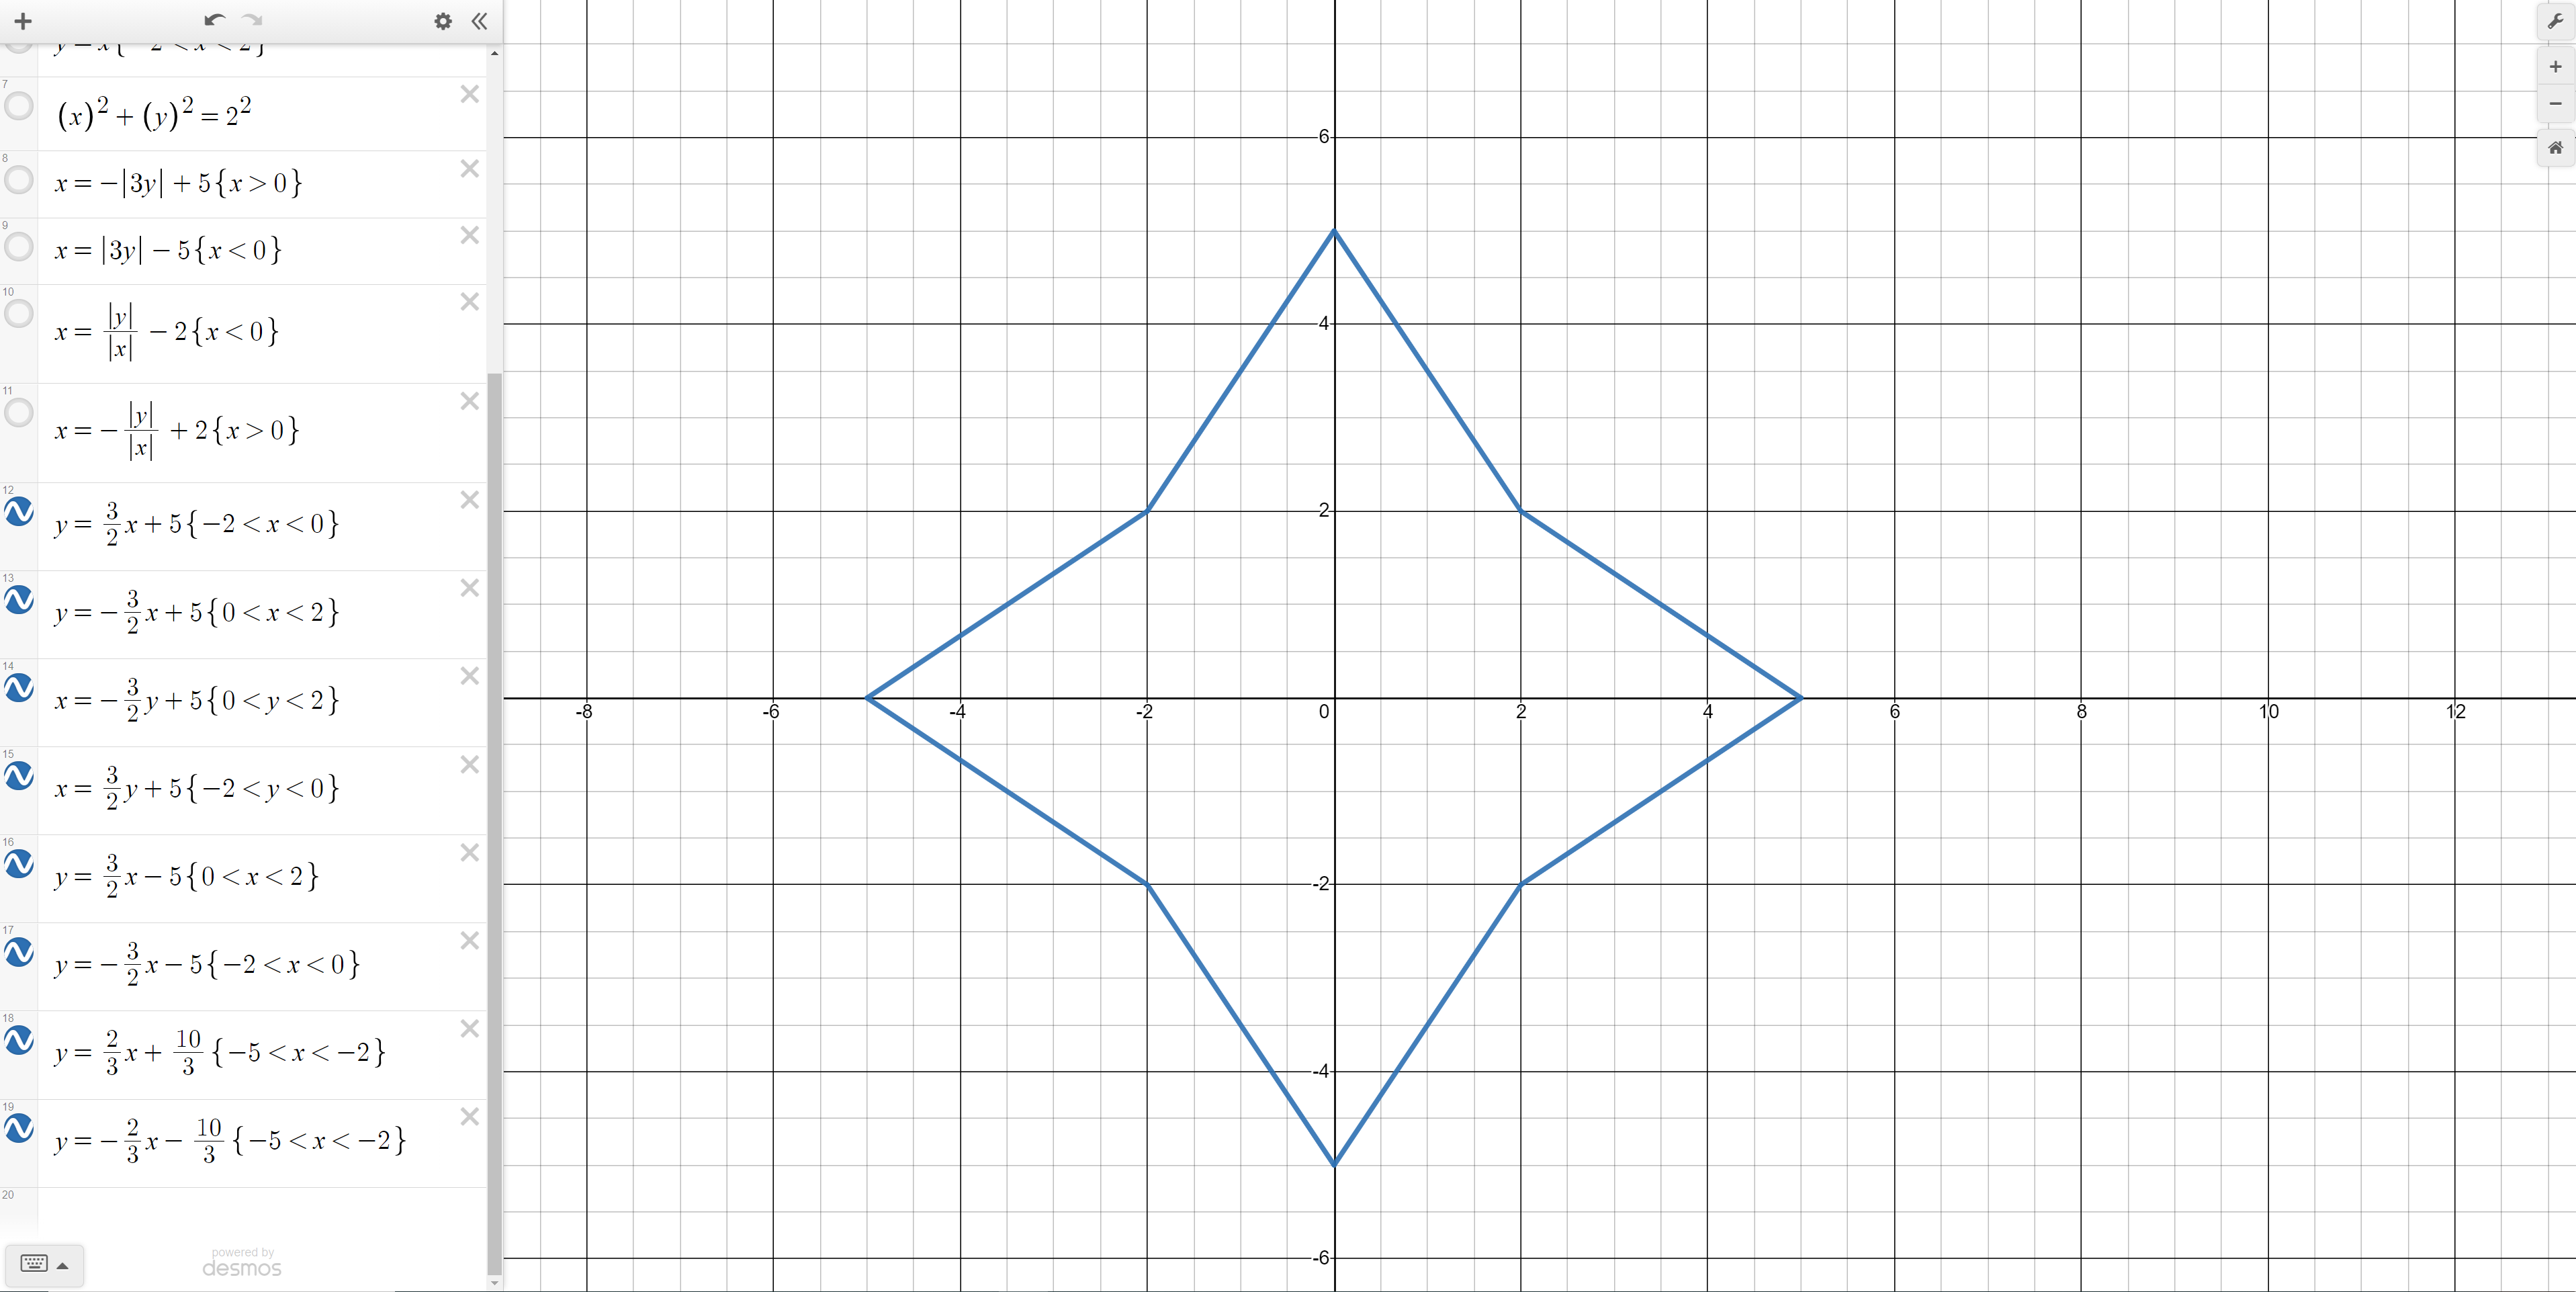
Step 3: Expanding your Desmos geometric design

Next we will add some absolute value equations. But before that we will unselect the equations we have written so far so that the view is not cluttered.
Try plotting the base function y = |x|. It is not very steep so lets change it to y = 3|x|. Next, shift this function down 5 units and limit it to under the x axis. Your equation should thus be: y = 3|x| - 5, with y restricted to being less than 0. We can negate this function and calculate the two inverses. All these functions put together make our design look more like a star.
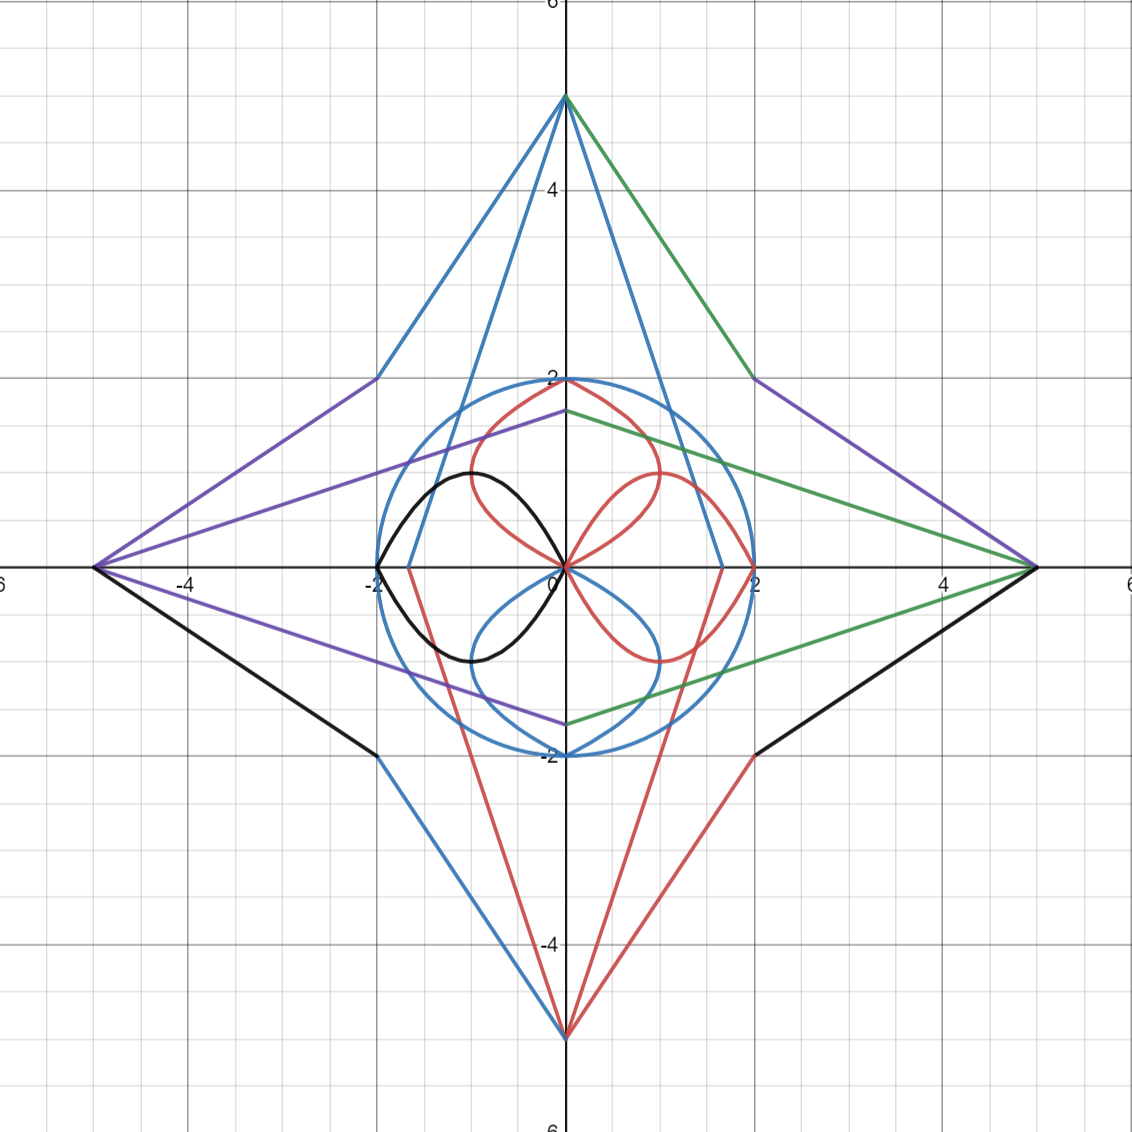
Step 4: Completing your Desmos geometric design
Finally, let’s add some straight (linear) lines around the star to complete it. Through calculation we can derive the line y = 1.5x + 5 and limit the x values to the range [-2,0]. We can invert these lines and negate them to get the lines in the picture above.
Finally, we re-select the older curves to create the final design.
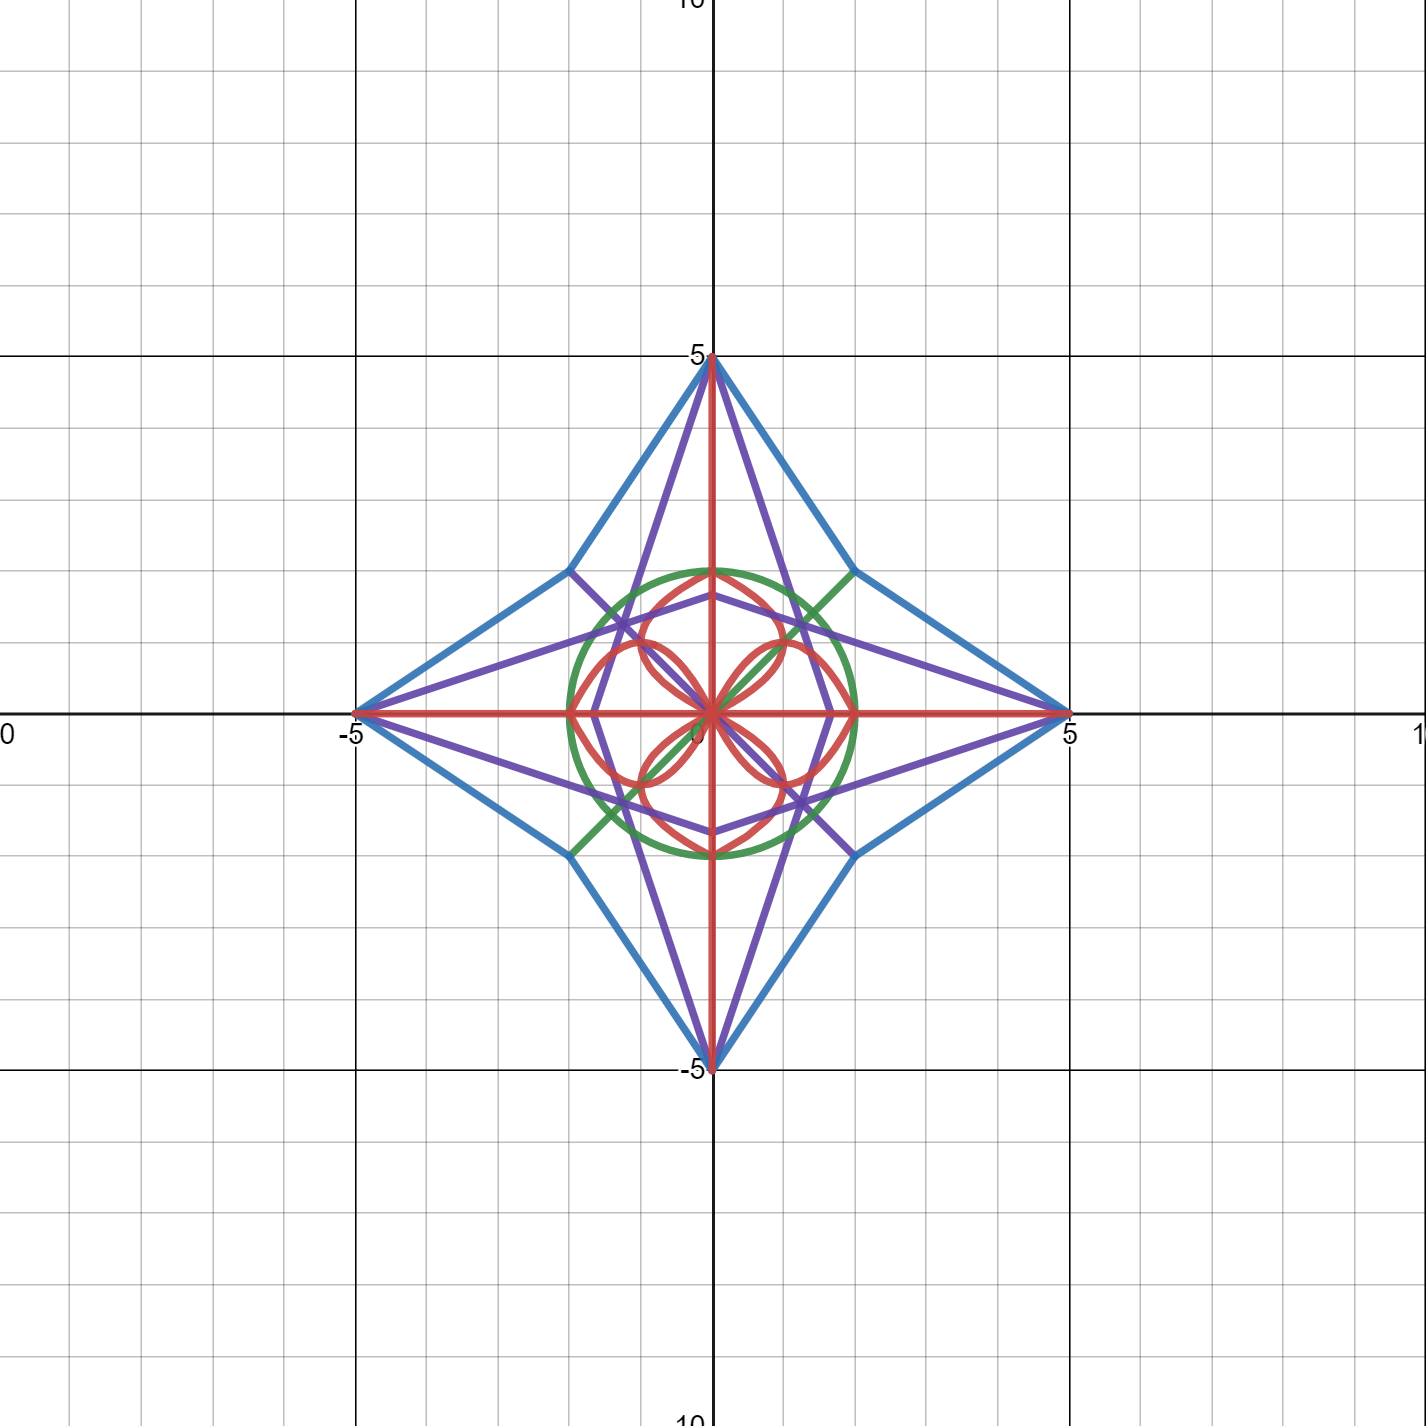
Our final project looks like:
Congratulations! Don’t stop here though! Desmos gives you so many more capabilities, e.g., so many other equations you can add, colors you can customize, and so much more! Below is a more complex star made in Desmos.
Love this? Learn about math quadrants next! For more interesting drawing experience, explore how to draw a heart in Desmos. Explore Kodeclik’s Math courses and bootcamps! For more math fun, checkout our blog post on generating random numbers and on 100+ middle school math games.
